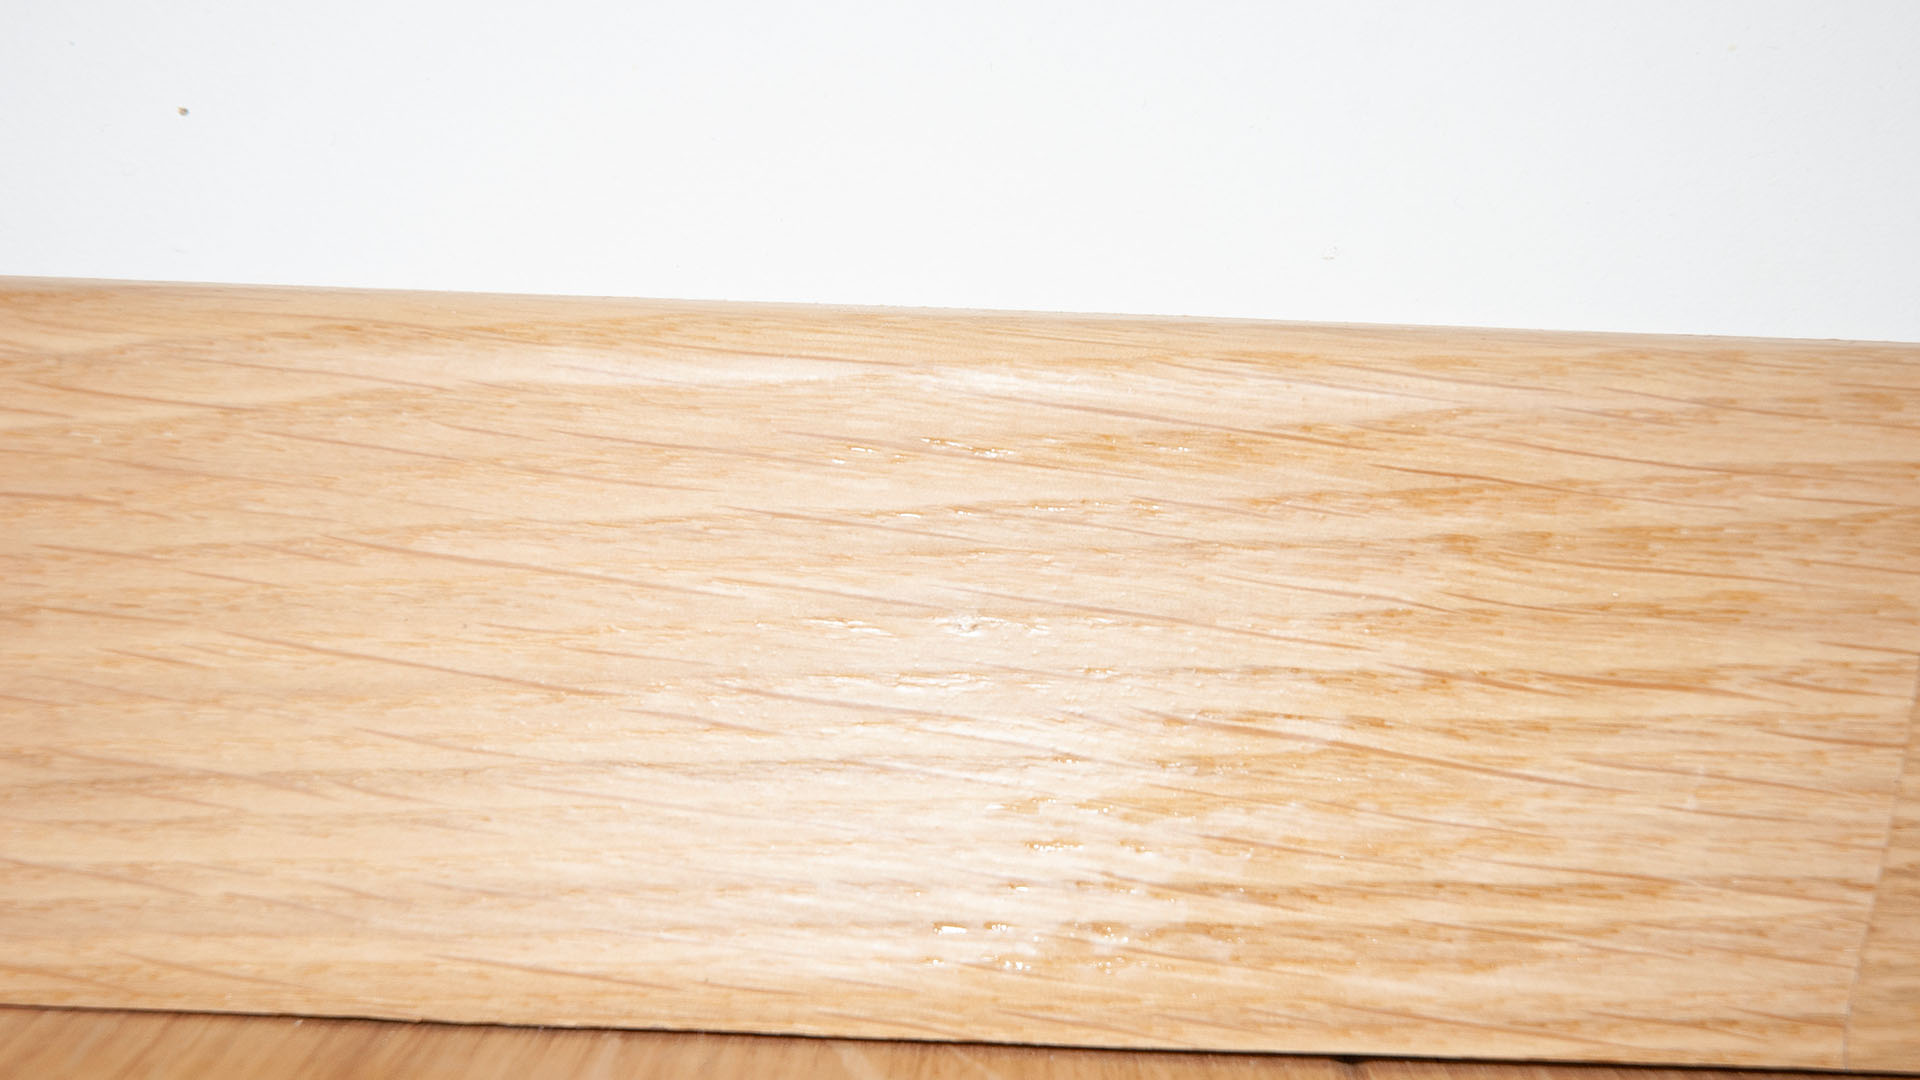
Wooden floor moldings are the perfect finish for wooden flooring, panels, or tiles. They are highly functional and dimensionally stable. Barlinek offers a wide range of moldings in various designs and finishes – including those covered with natural veneer, painted white, or foil-wrapped. Floor moldings are available in a broad selection of profiles and heights, making it easy to complement interiors in different styles. It’s also worth noting that installing wooden floor moldings is simple.
contents
Moldings installation
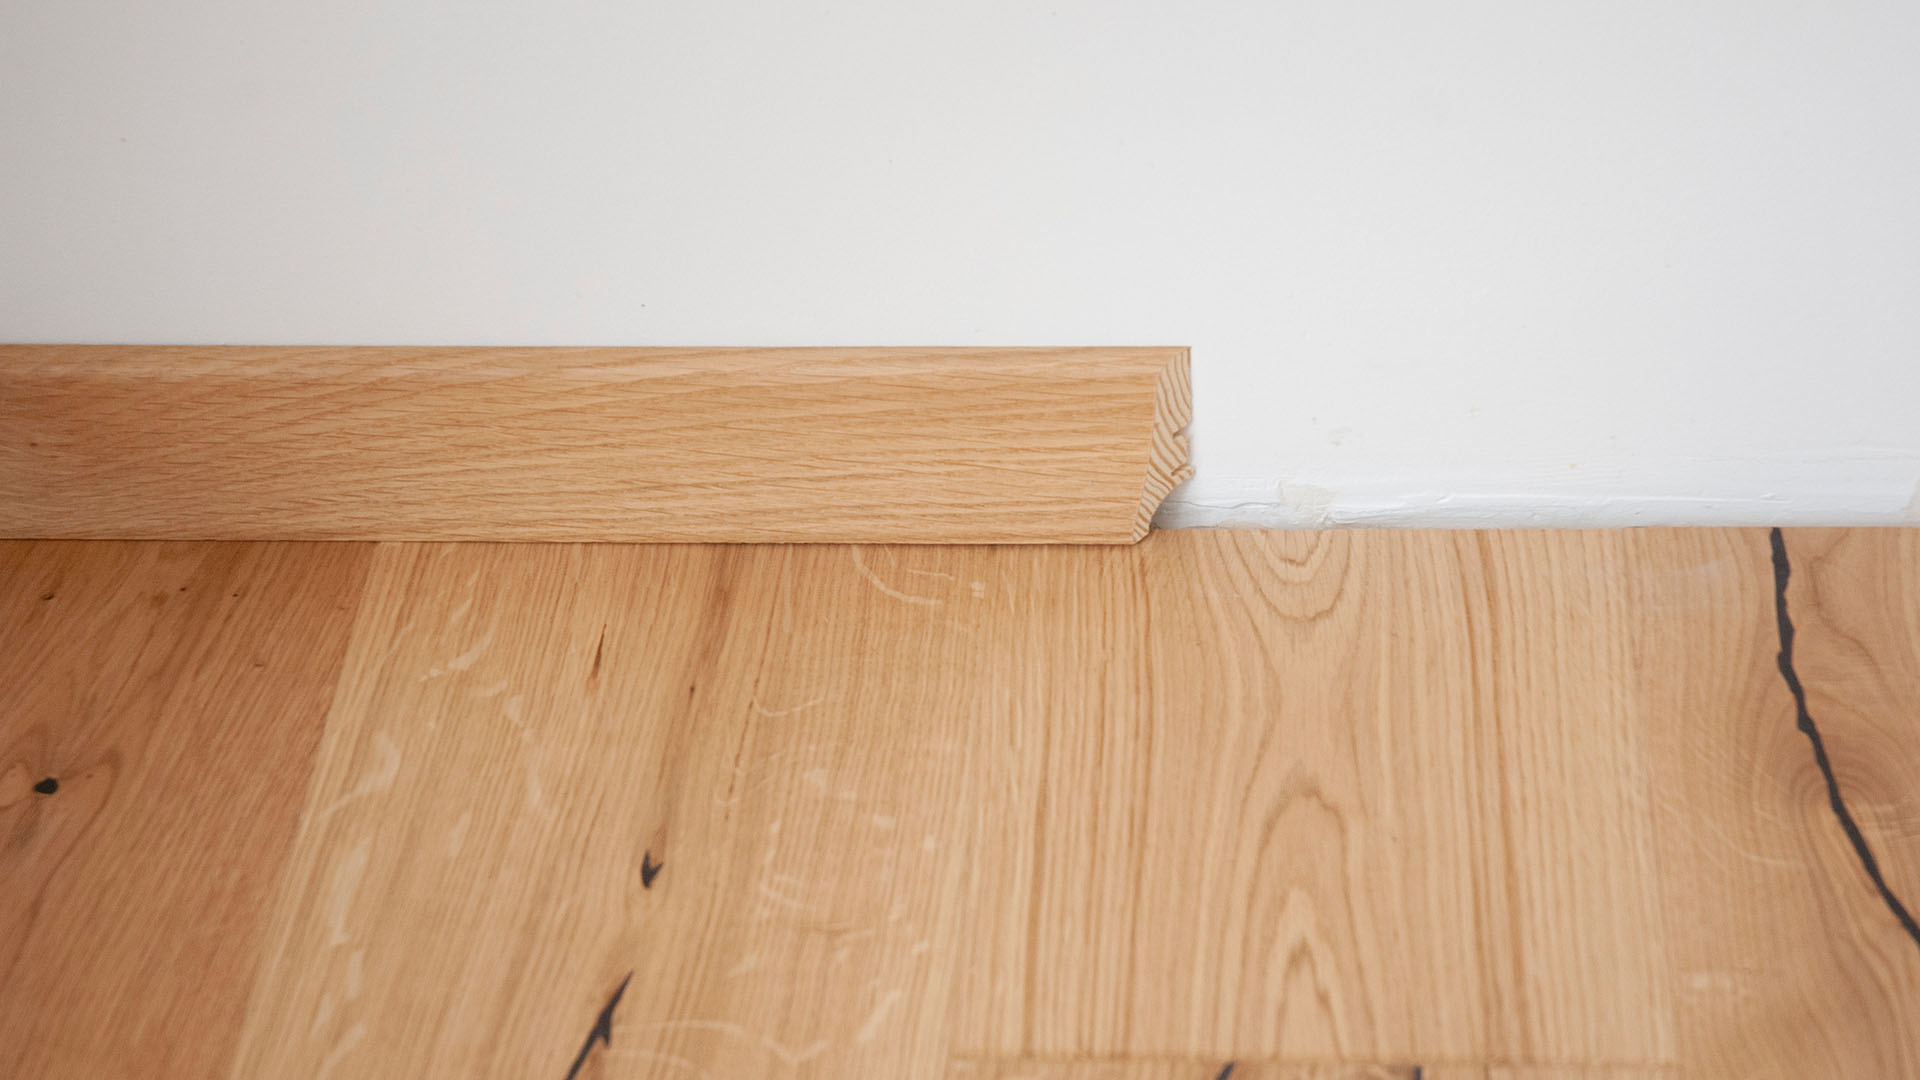
Installation of wooden skirting boards is easy. Skirting boards are an integral part of every interior. They add character to the design, cover the gaps between the floor and the wall and make the room more cosy. In addition, they are extremely practical because they can easily cover unsightly cables.
Wooden floor moldings – installation with adhesive
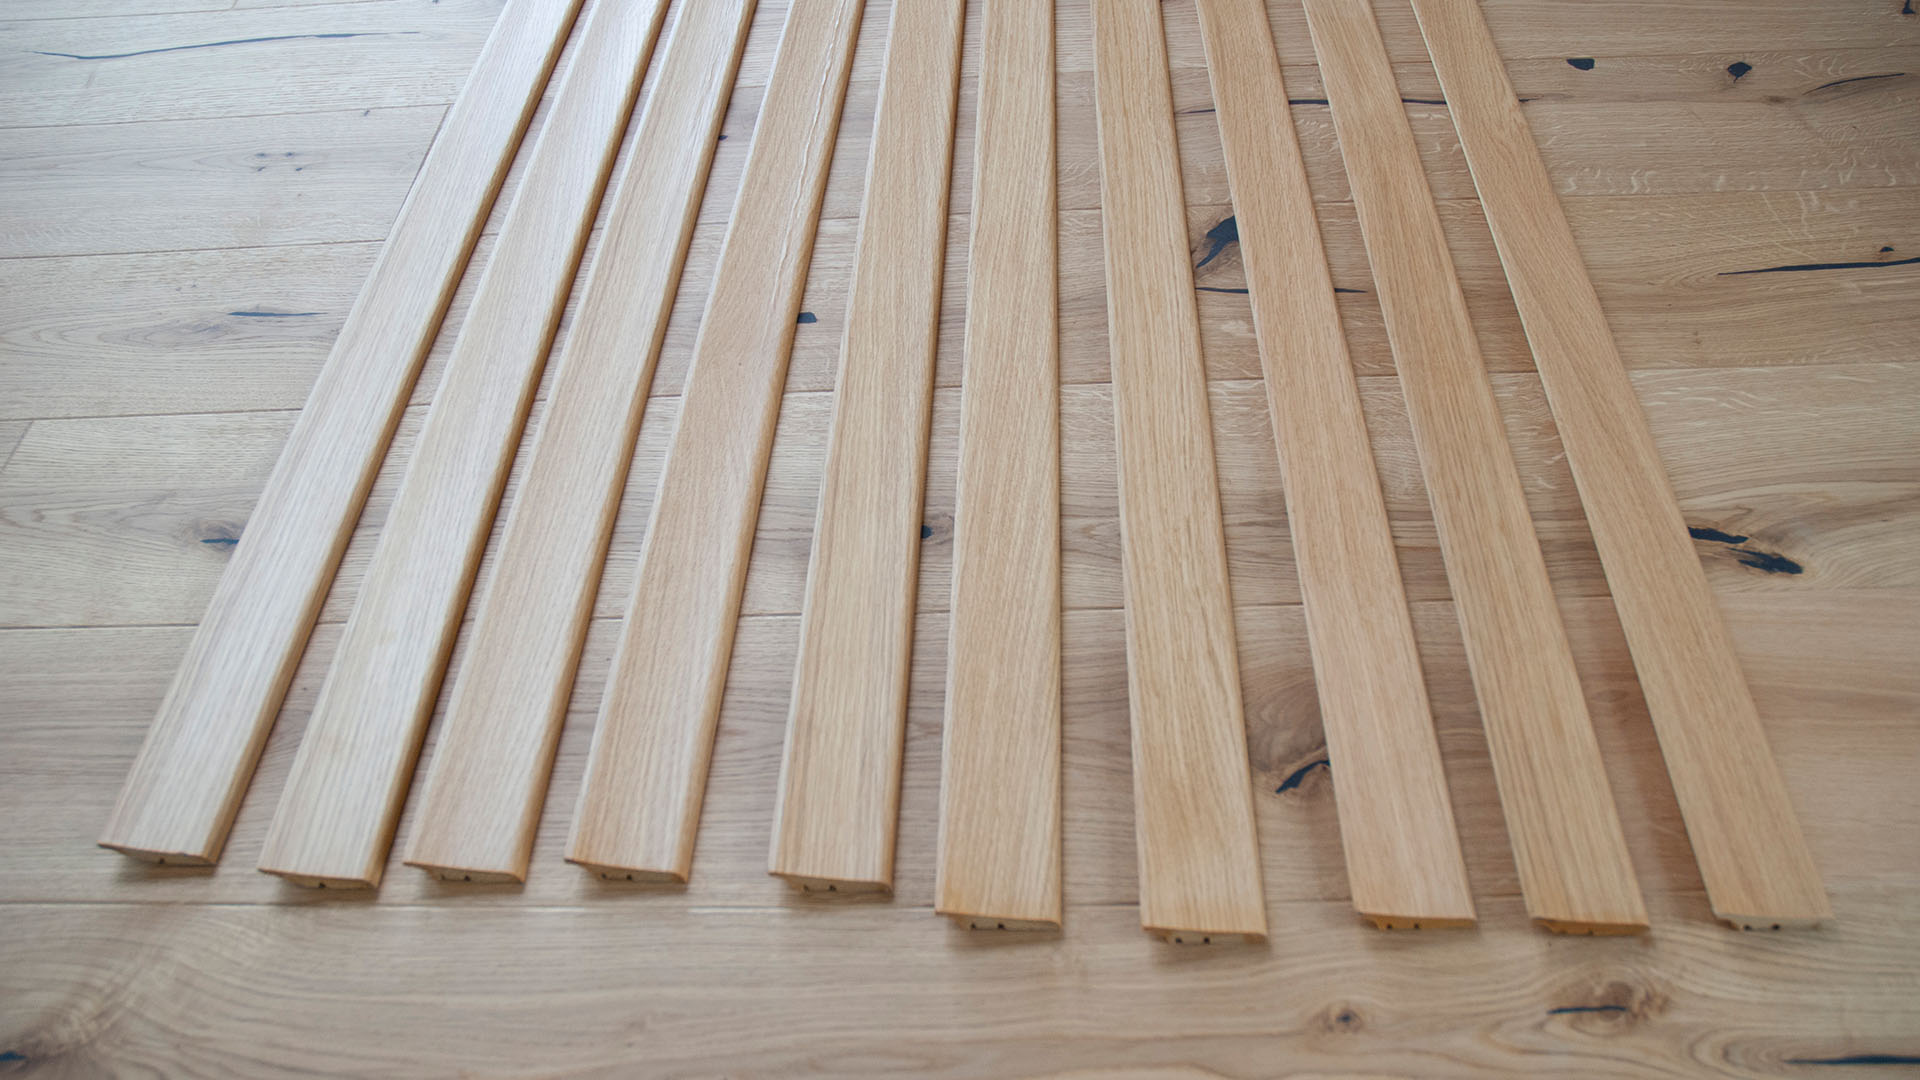
1. Barlinek wooden floor moldings are covered with natural veneer, which means there may be variations in color and grain. To avoid joining contrasting moldings, unpack them first and arrange them from the lightest to the darkest. Install them on the walls in this order.
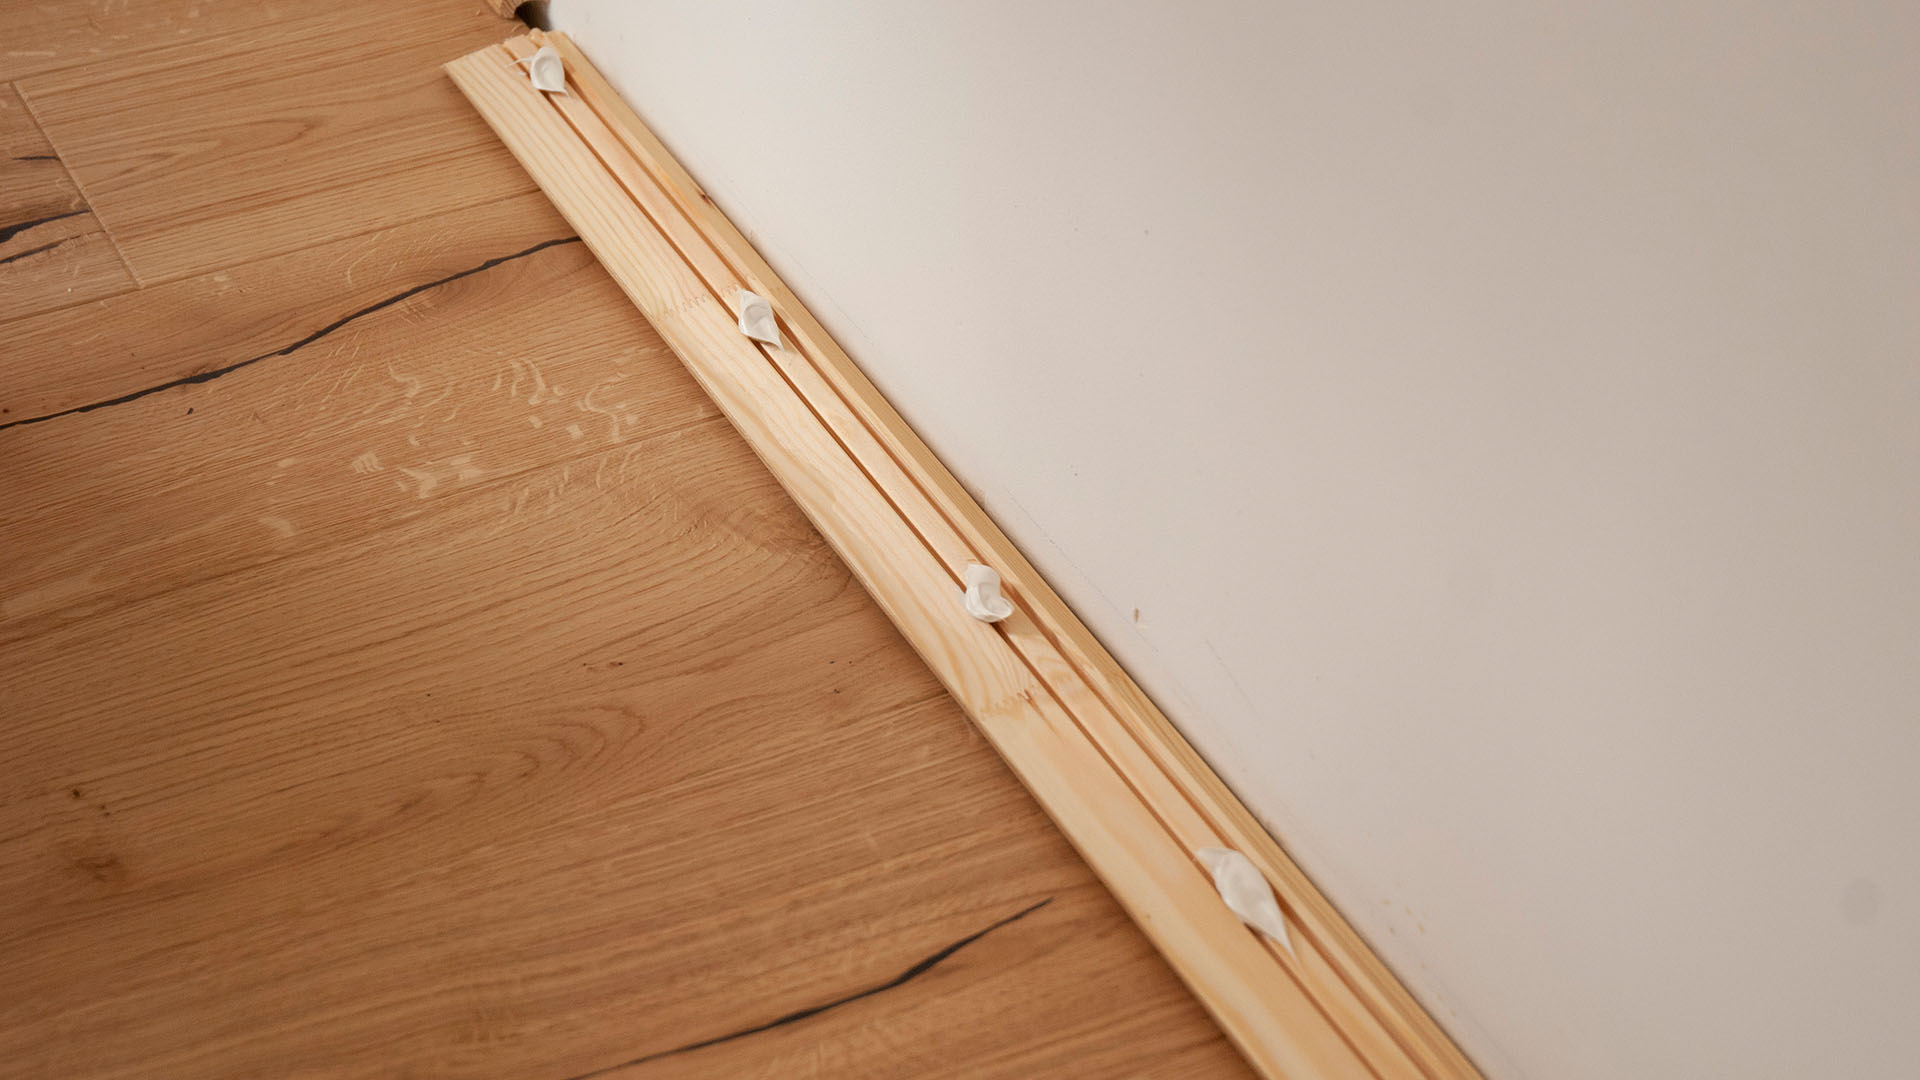
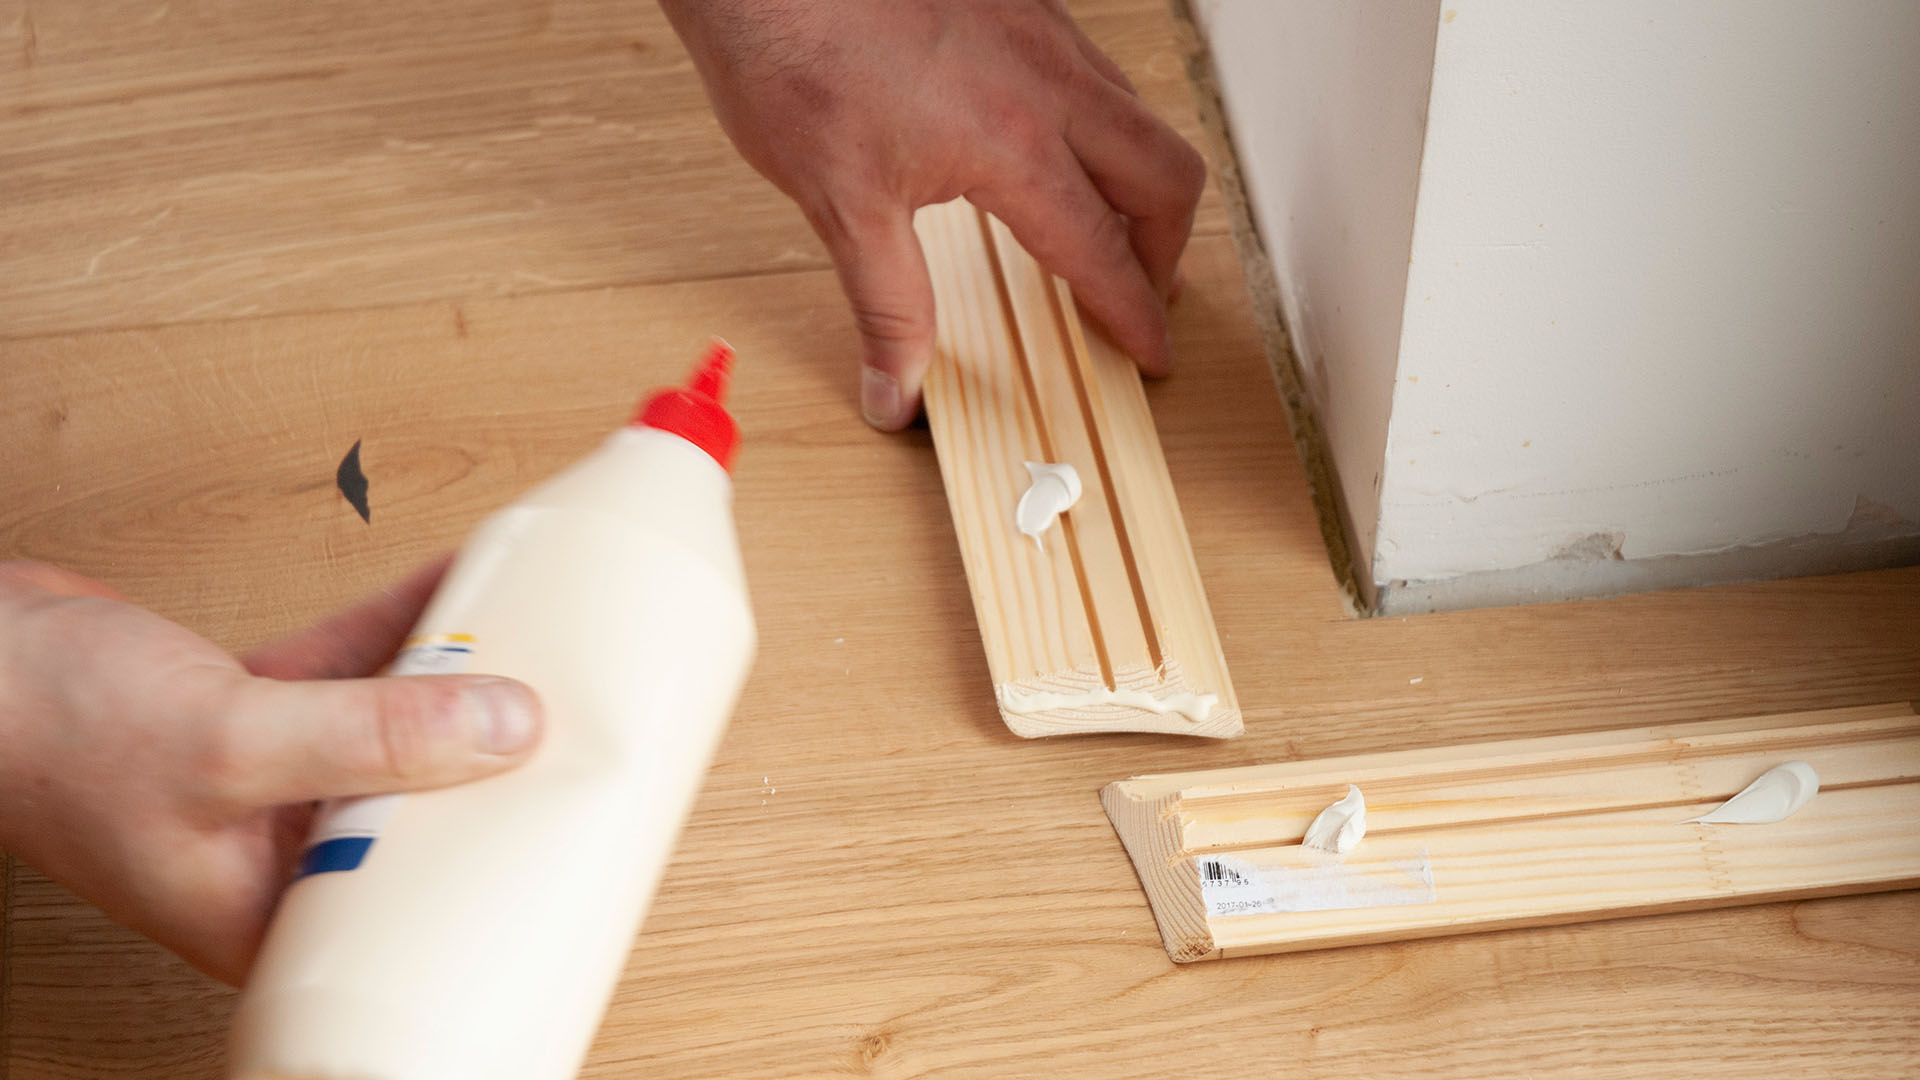
2. Apply adhesive to the molding in strips or dots every 10–15 cm. It’s best to use solvent-free adhesives based on polymers. Hot-melt adhesives can also be used. This additional fixing helps the moldings fit better to wall irregularities.
3. Moldings can be joined straight, but the best-looking joints are those cut at an angle of 22.5° or 45°. IMPORTANT: To make the joint as inconspicuous as possible, the cut should be made in the direction opposite to the room entrance.
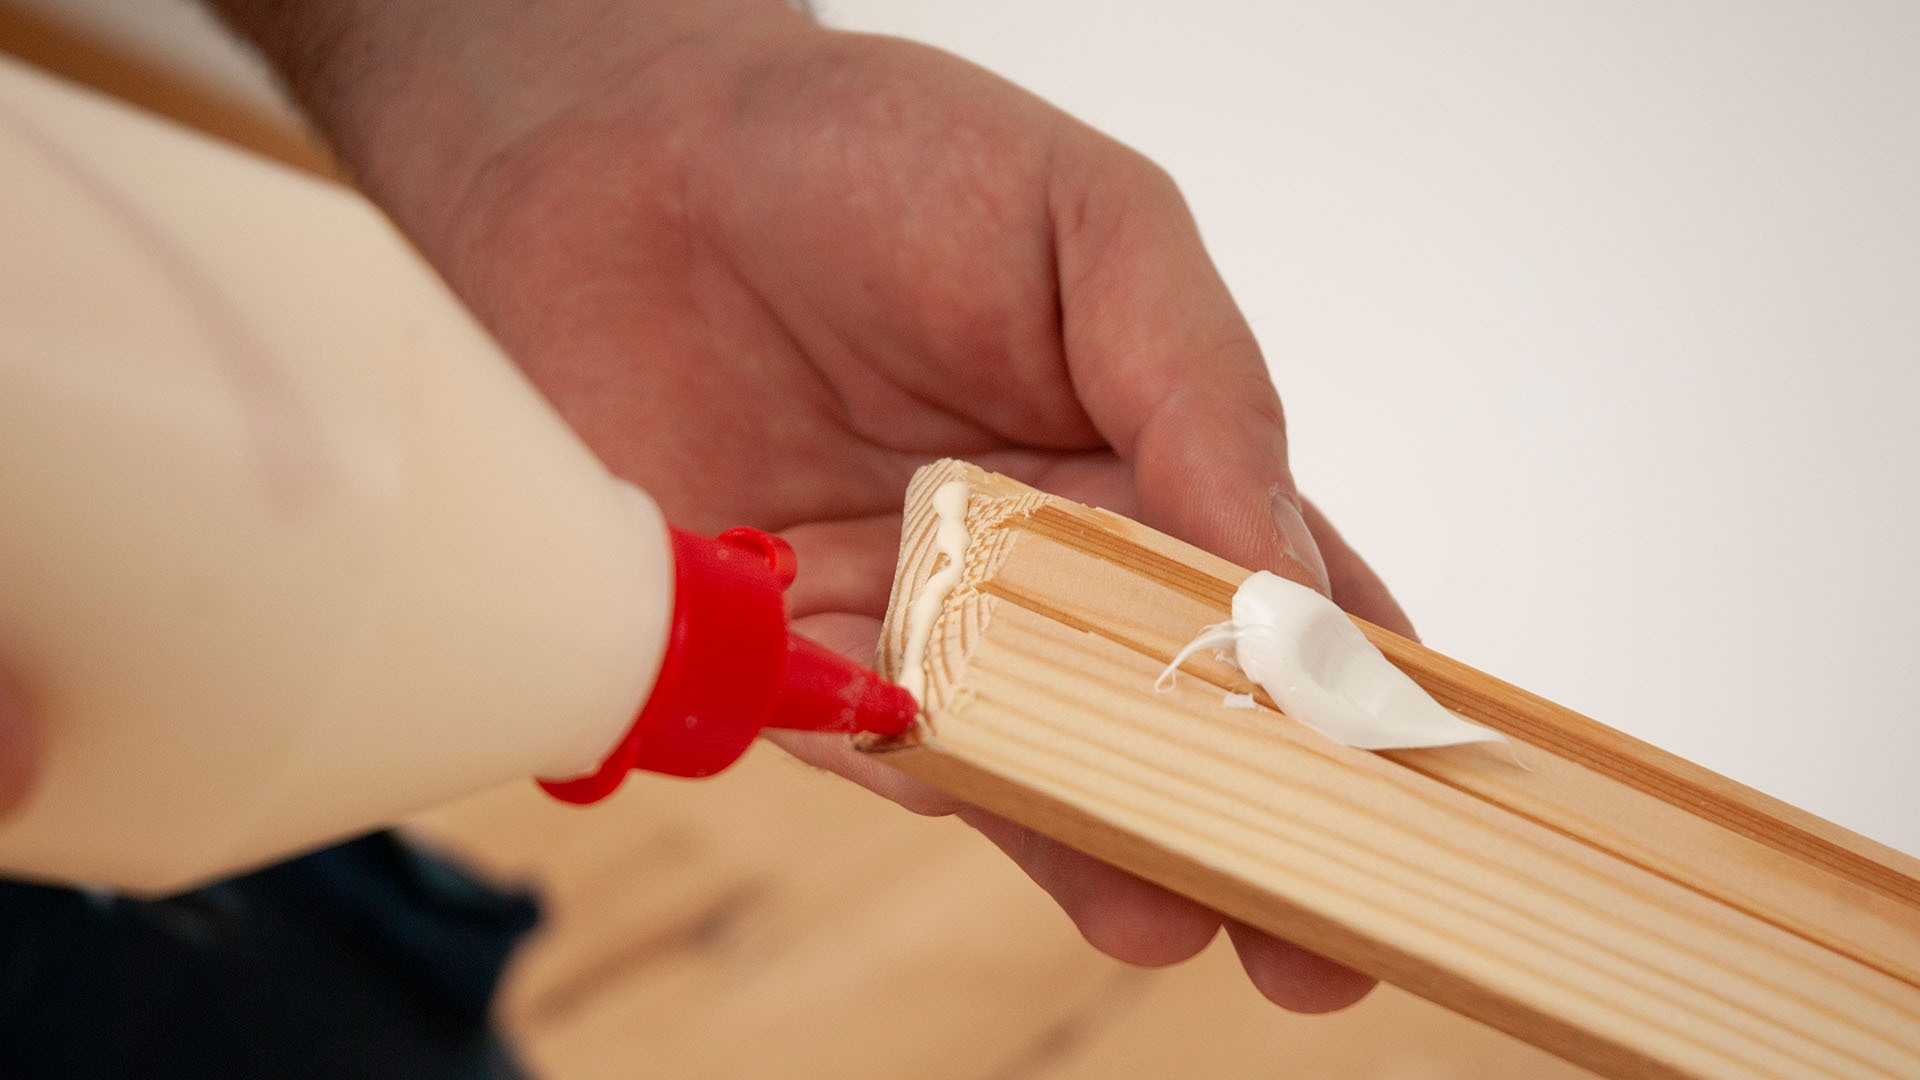
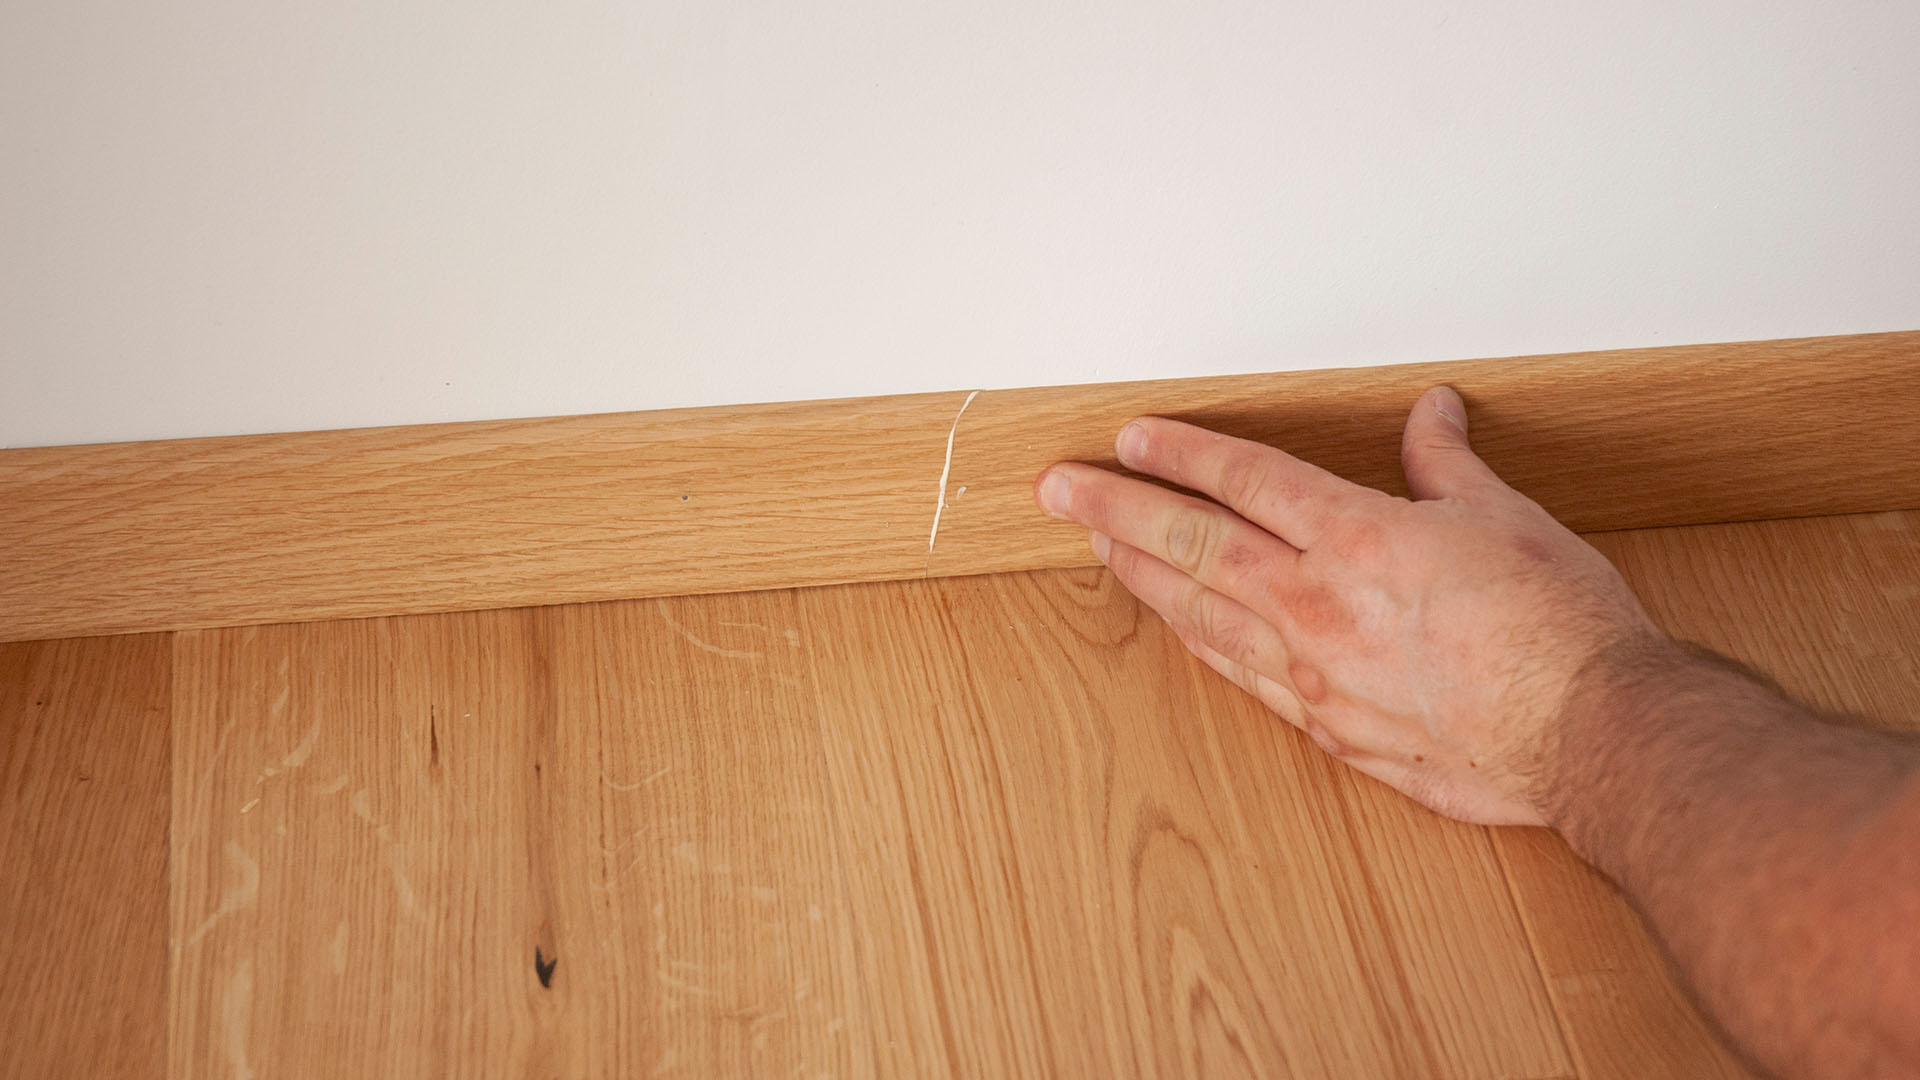
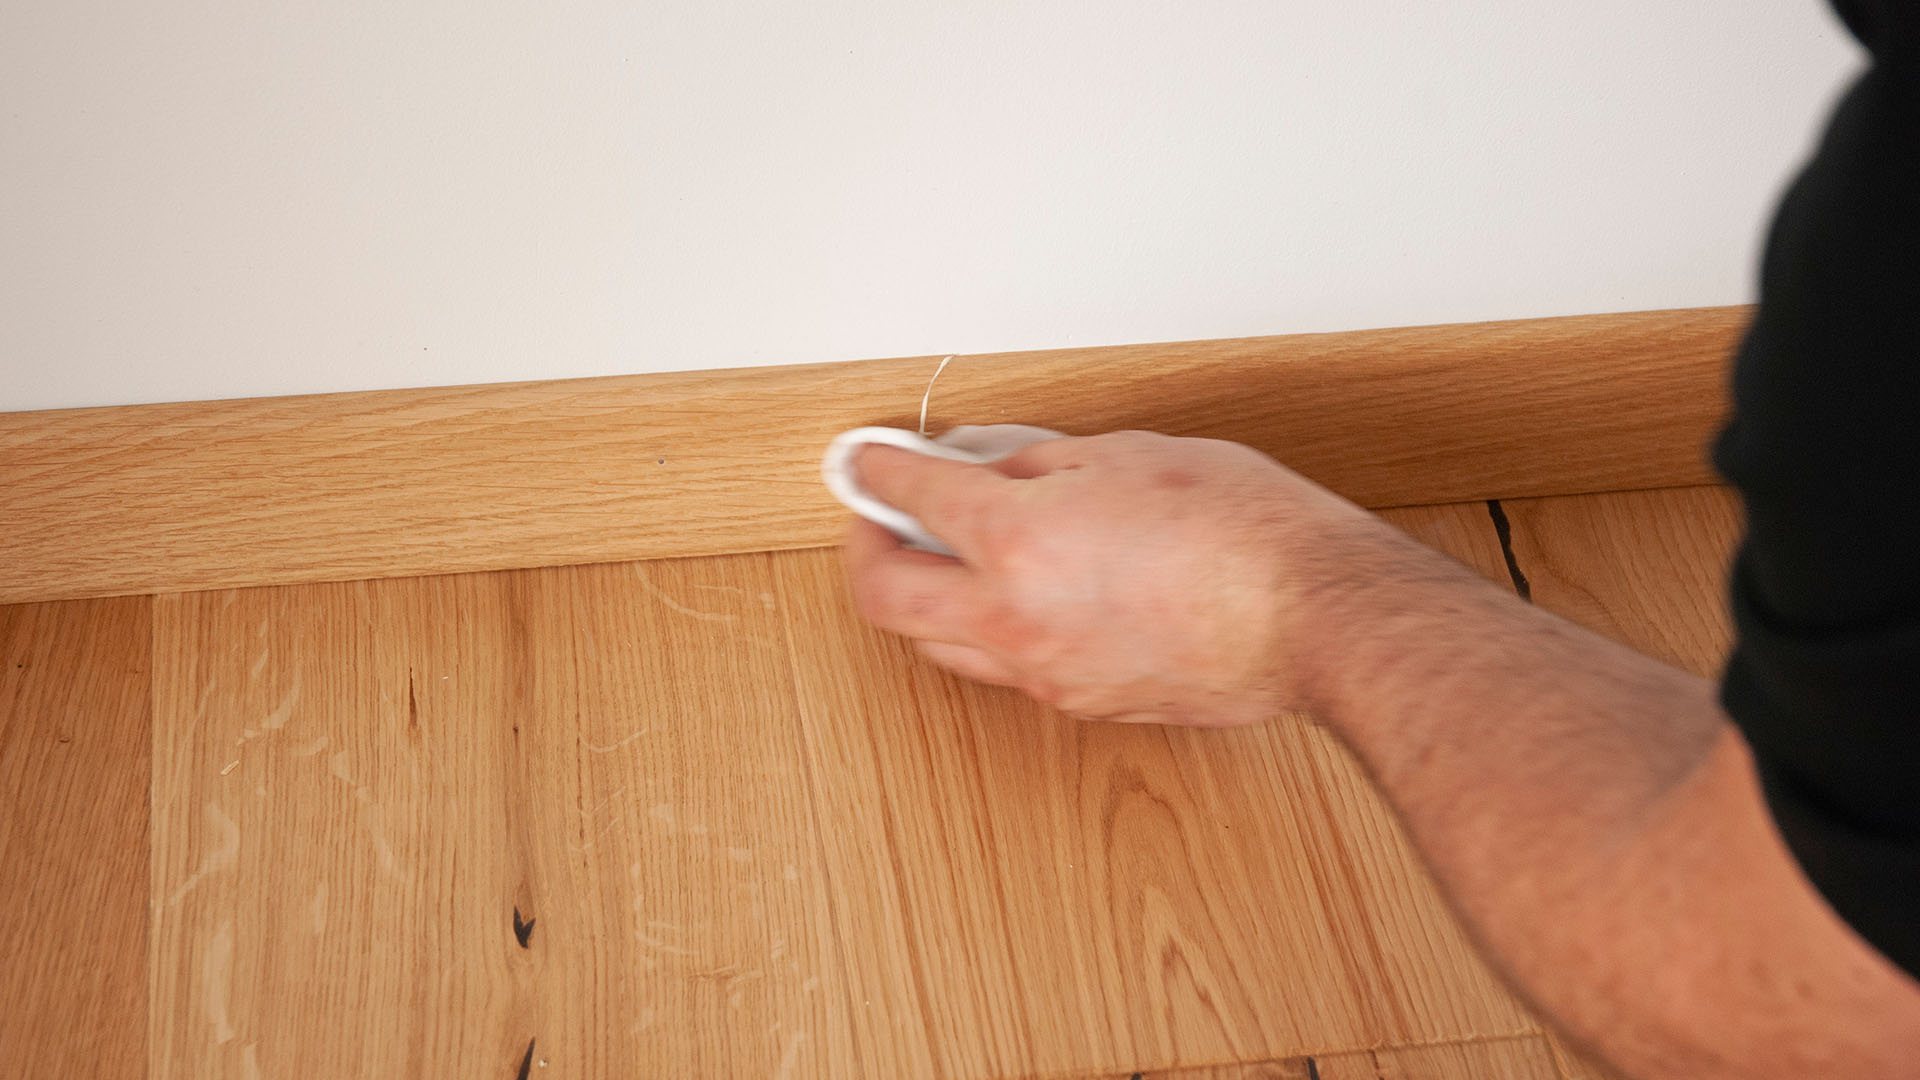
4. Apply wood glue to the joints between moldings. After pressing them together, remove any excess glue with a cloth.
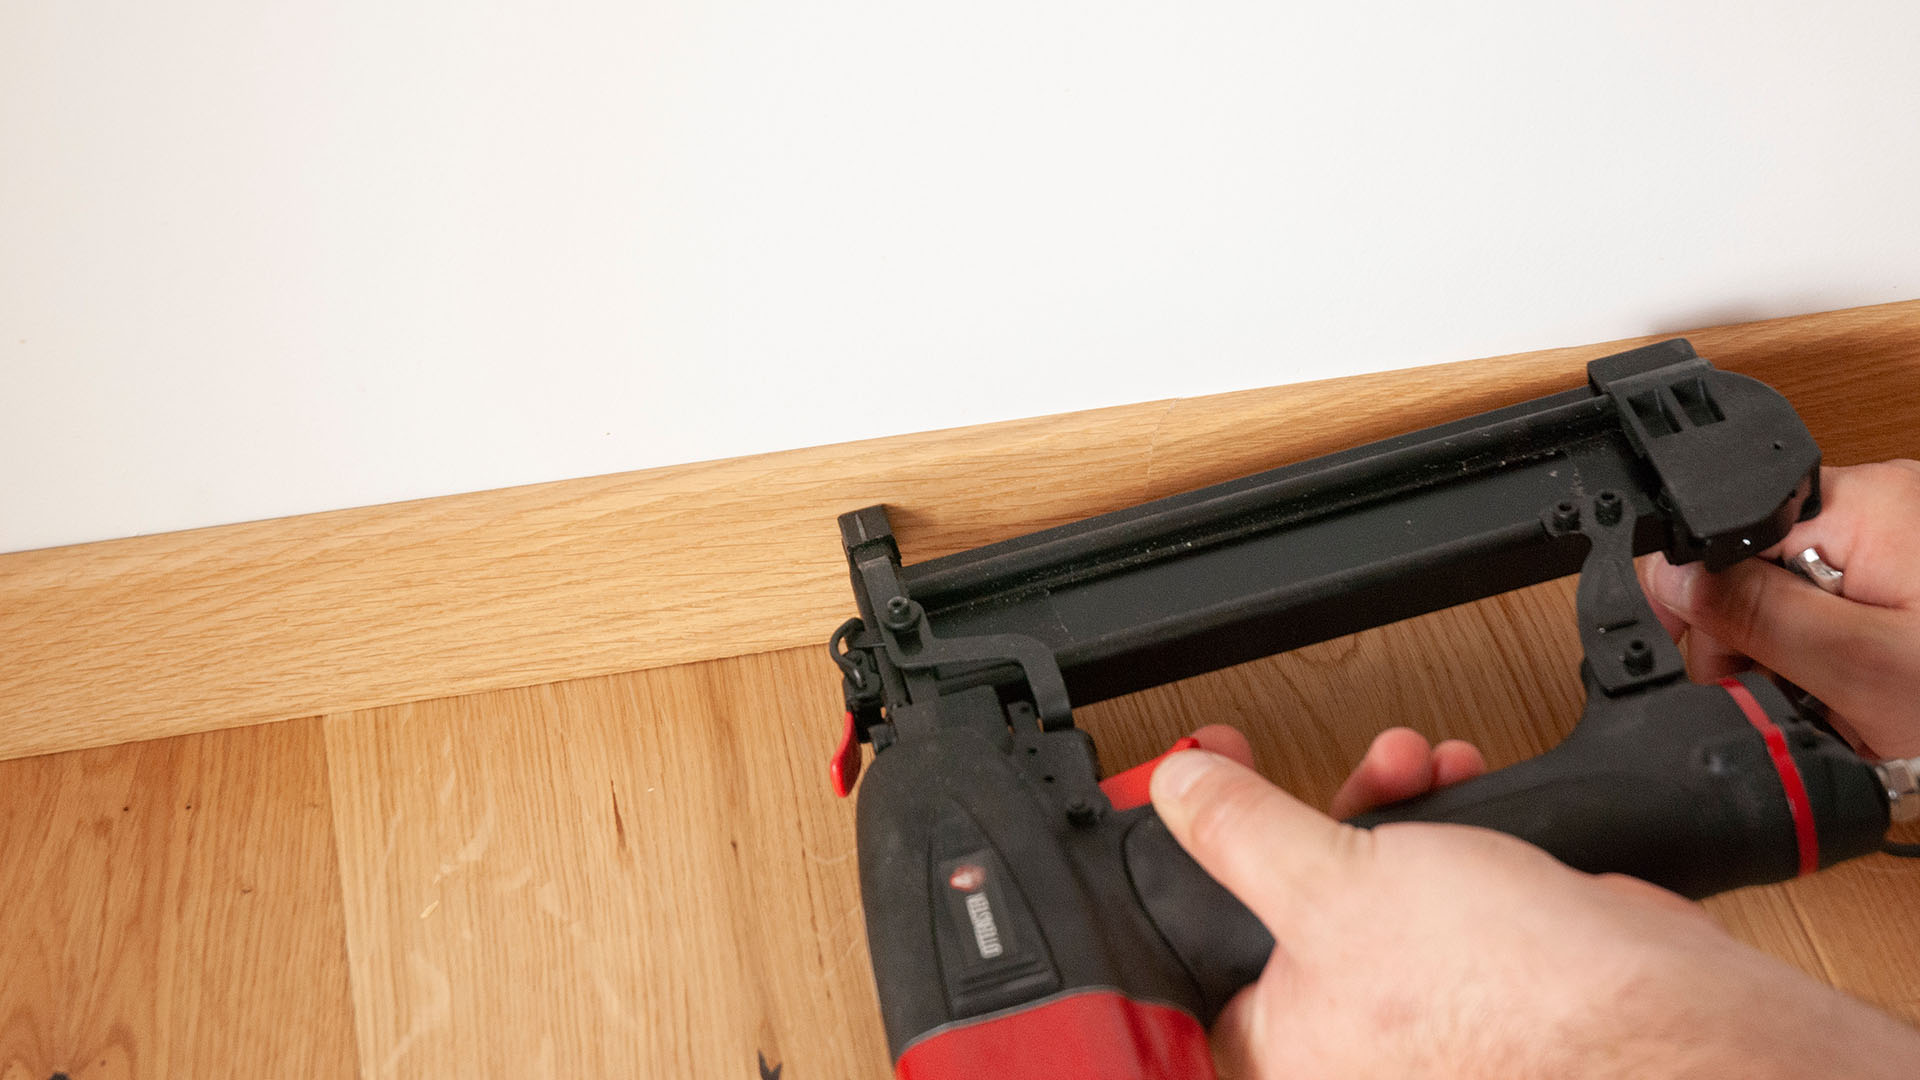
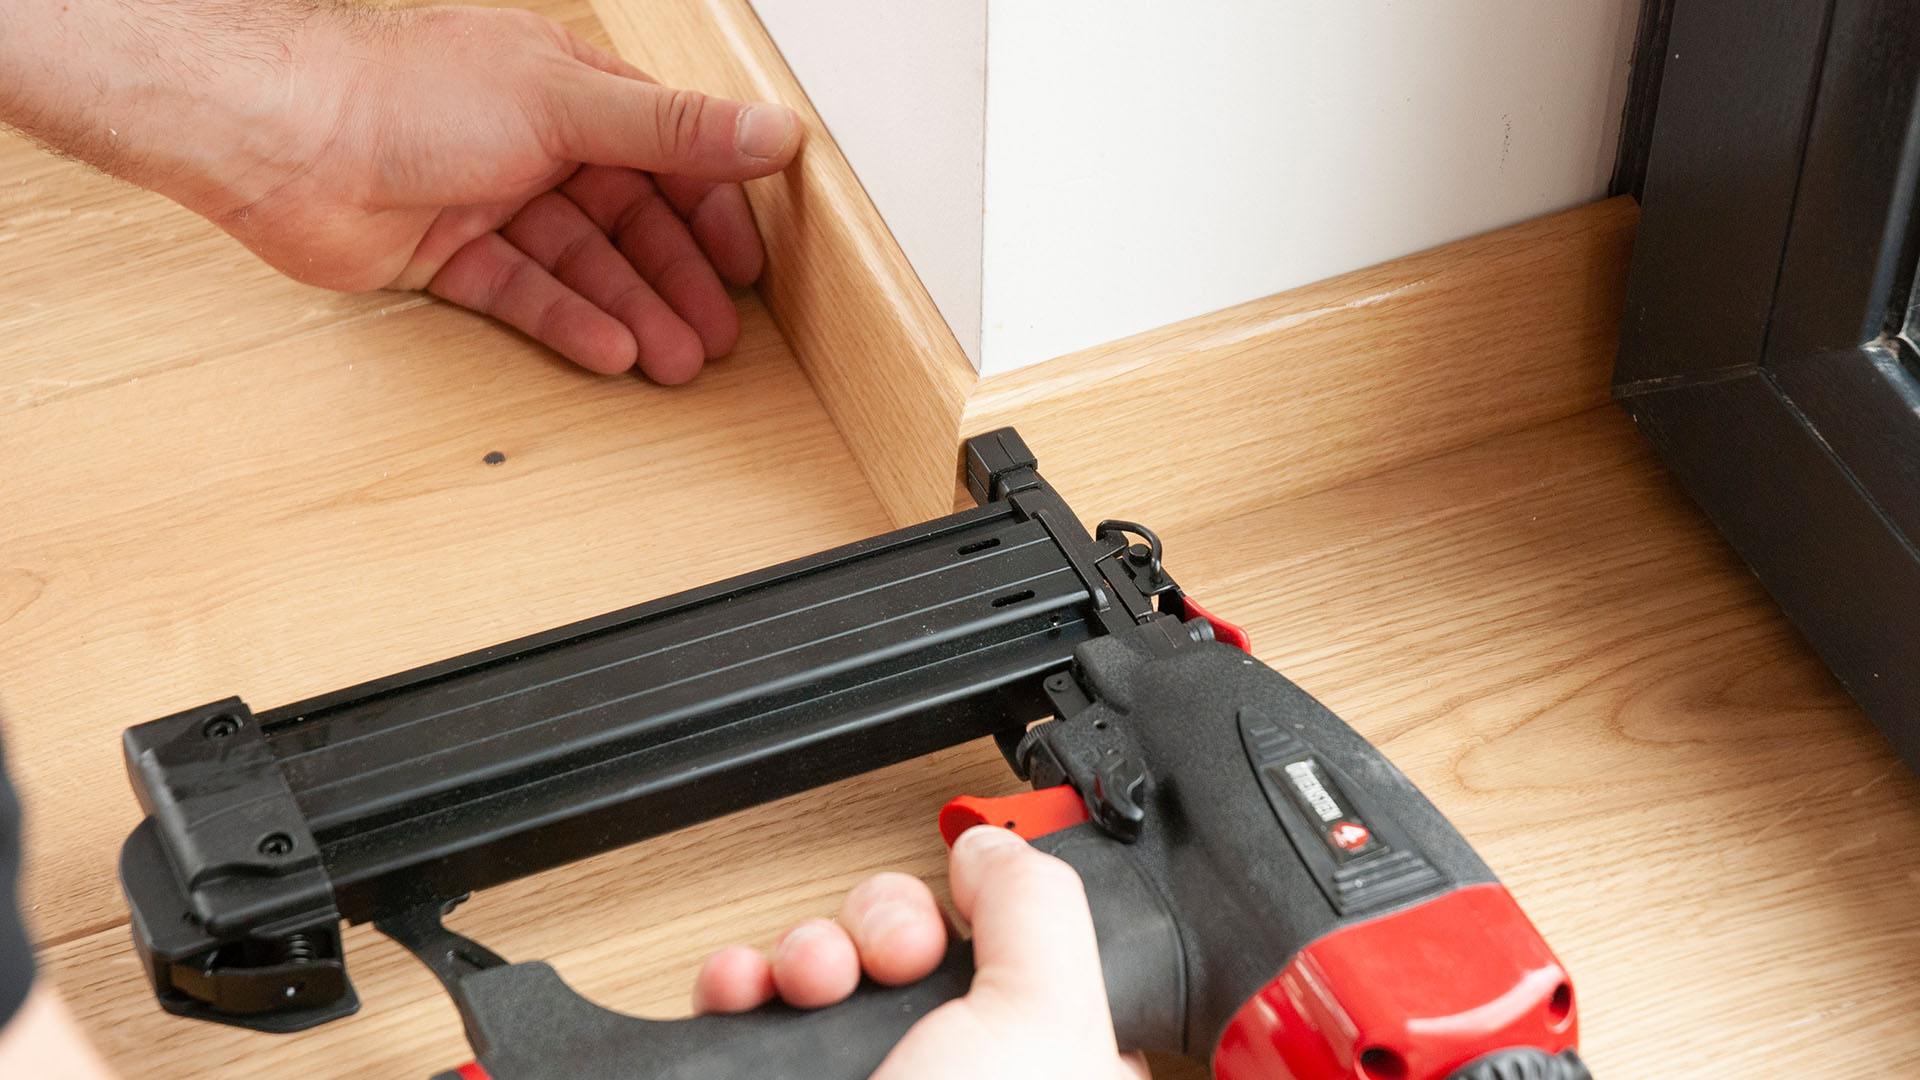
5. In addition to adhesive, you can also use pneumatic pins or nails driven into the moldings with a hammer. The optimal length is 25–35 mm, depending on the type of plaster and the materials the walls are made of.
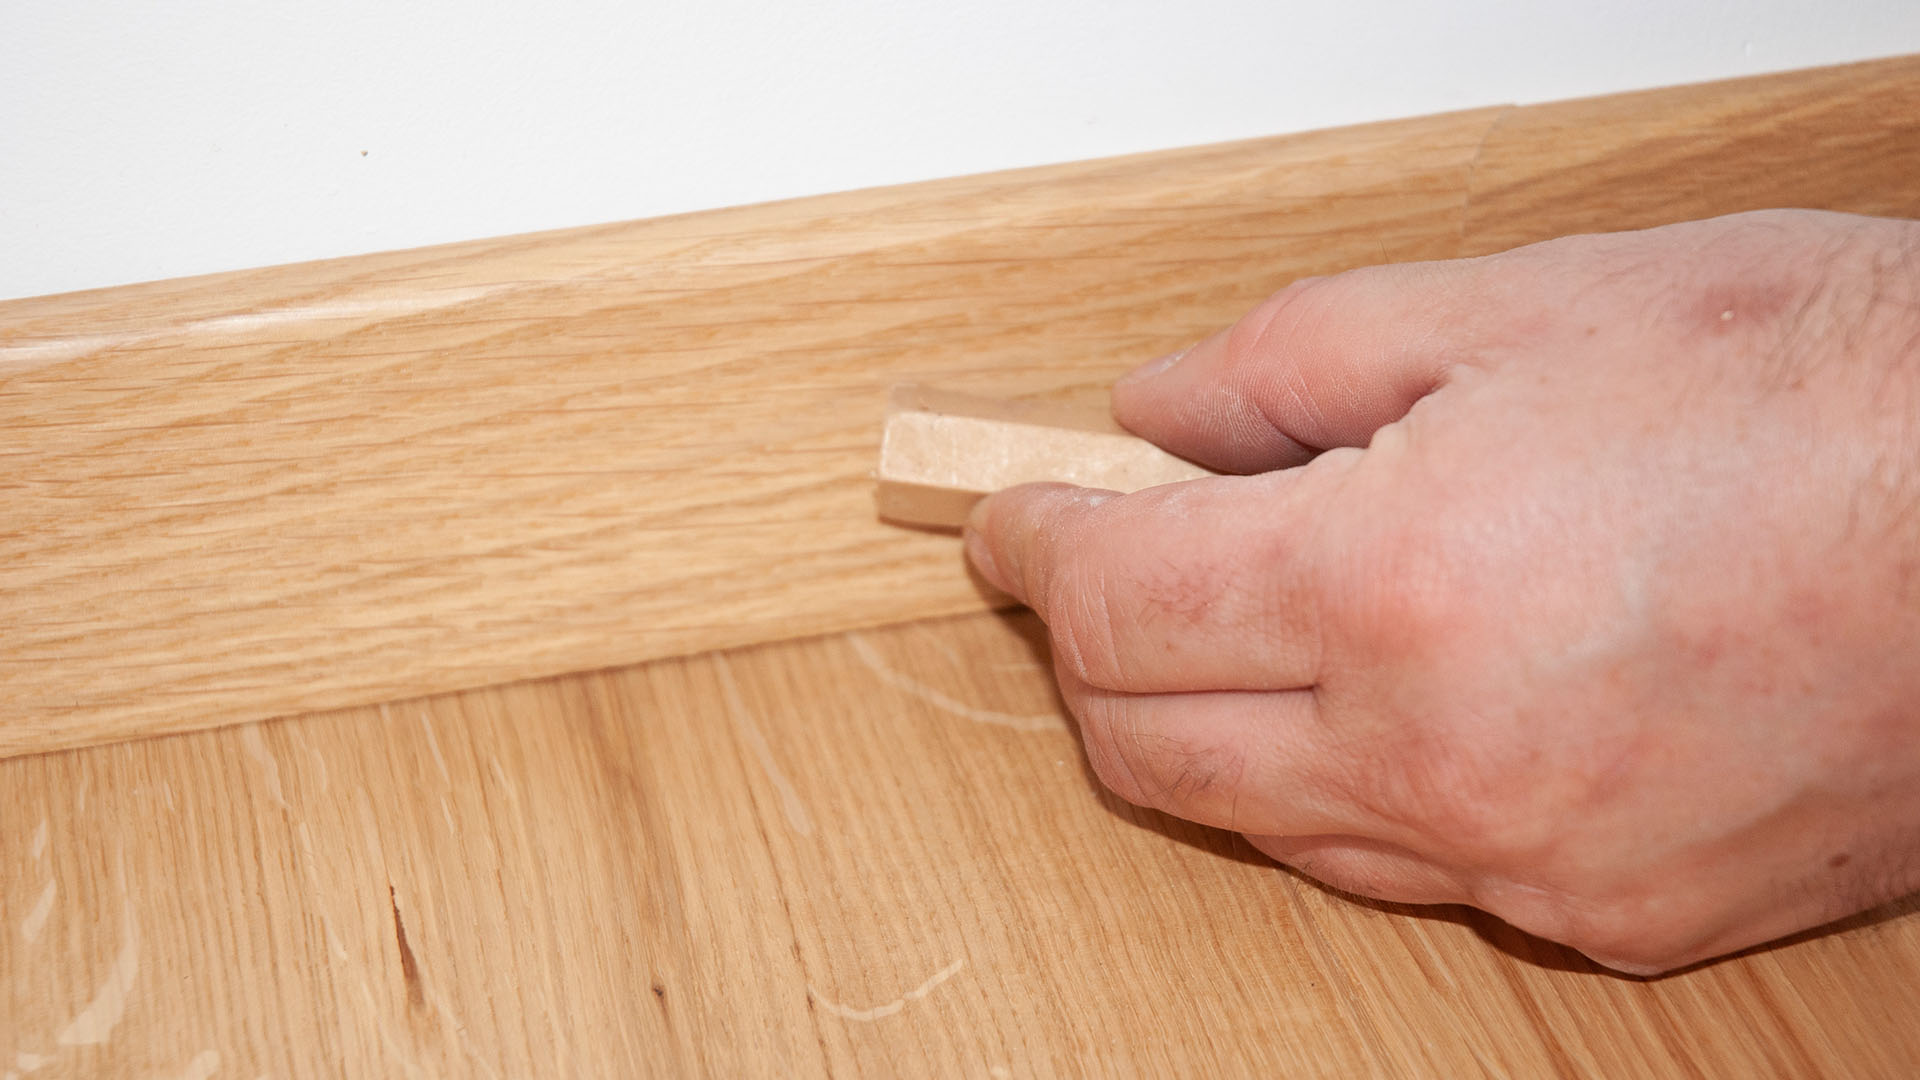
6. The holes left by pins or nails can be easily concealed with colored wax or parquet filler.
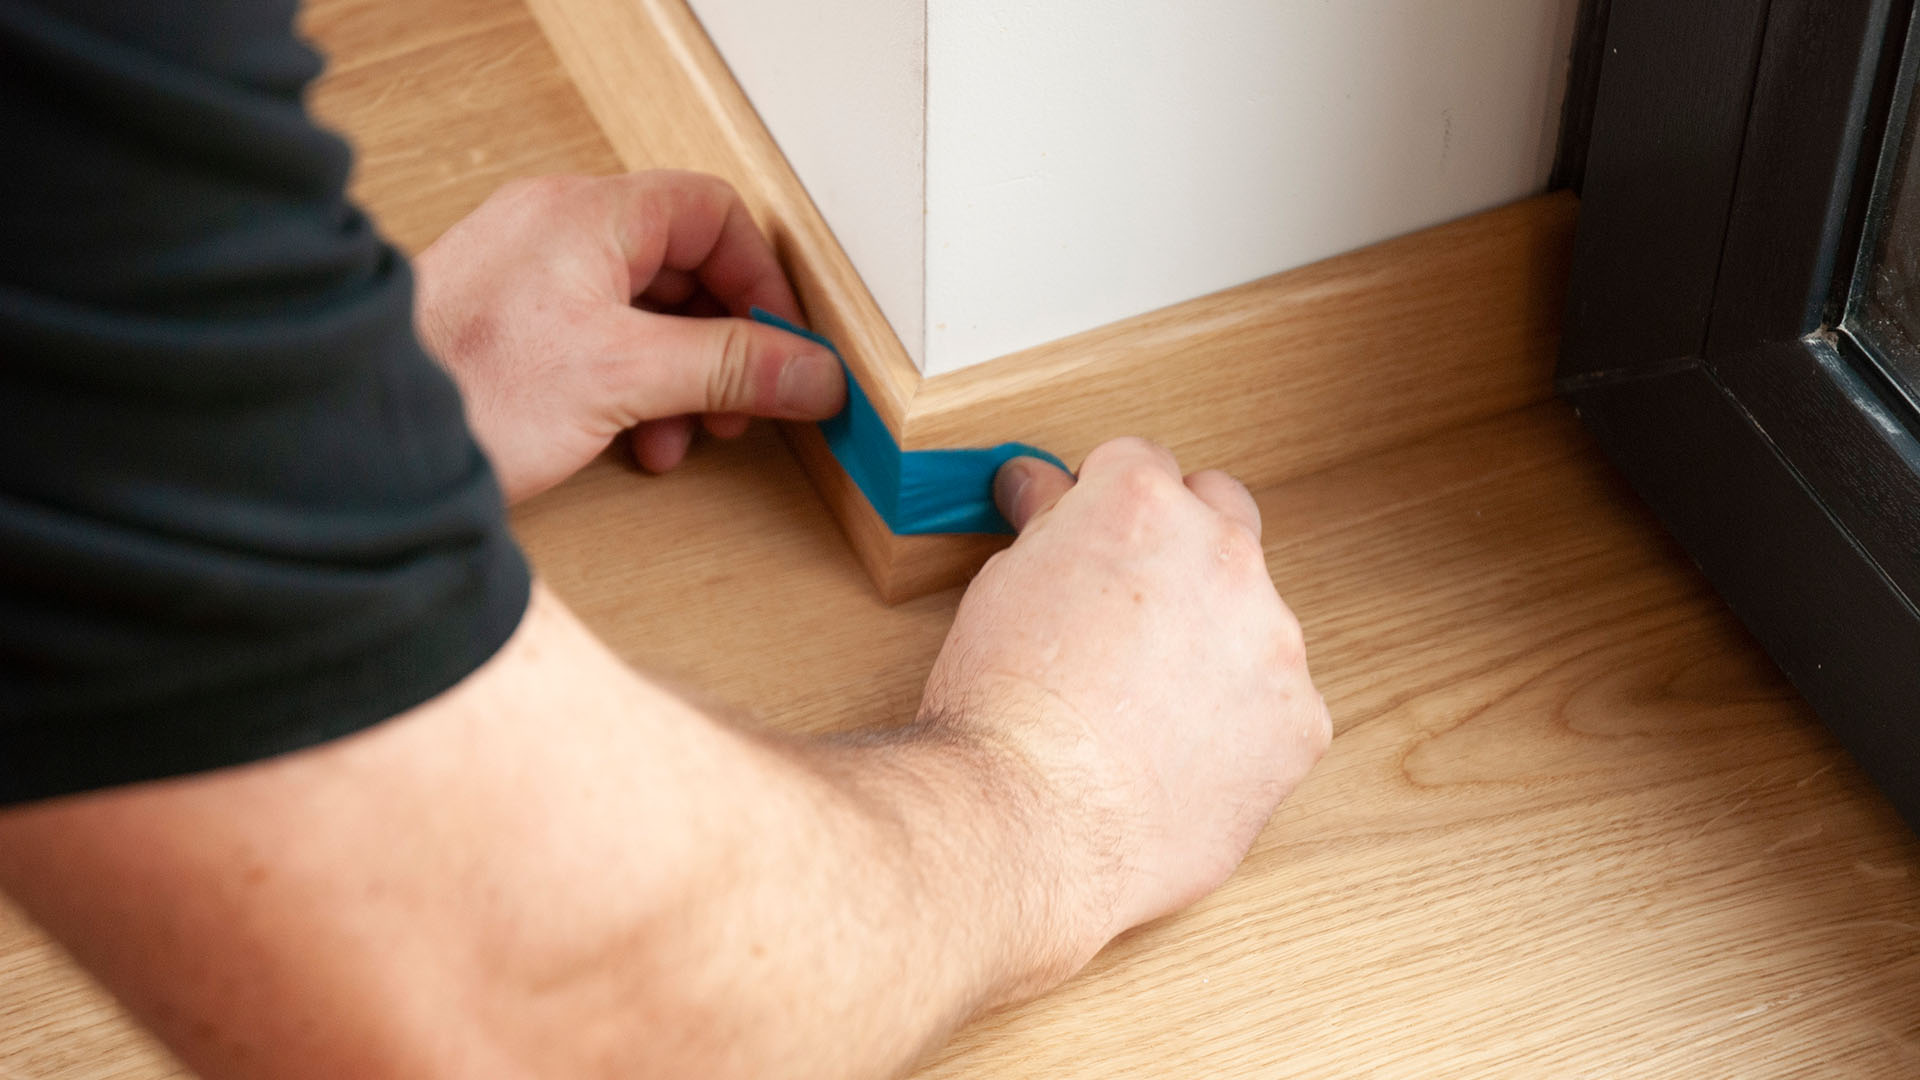
7. For joints in internal and external corners, also apply wood glue. External corners can be additionally reinforced with pins. To prevent the moldings from shifting during installation, you can temporarily secure the corners with tape, which should be removed after the installation is complete.
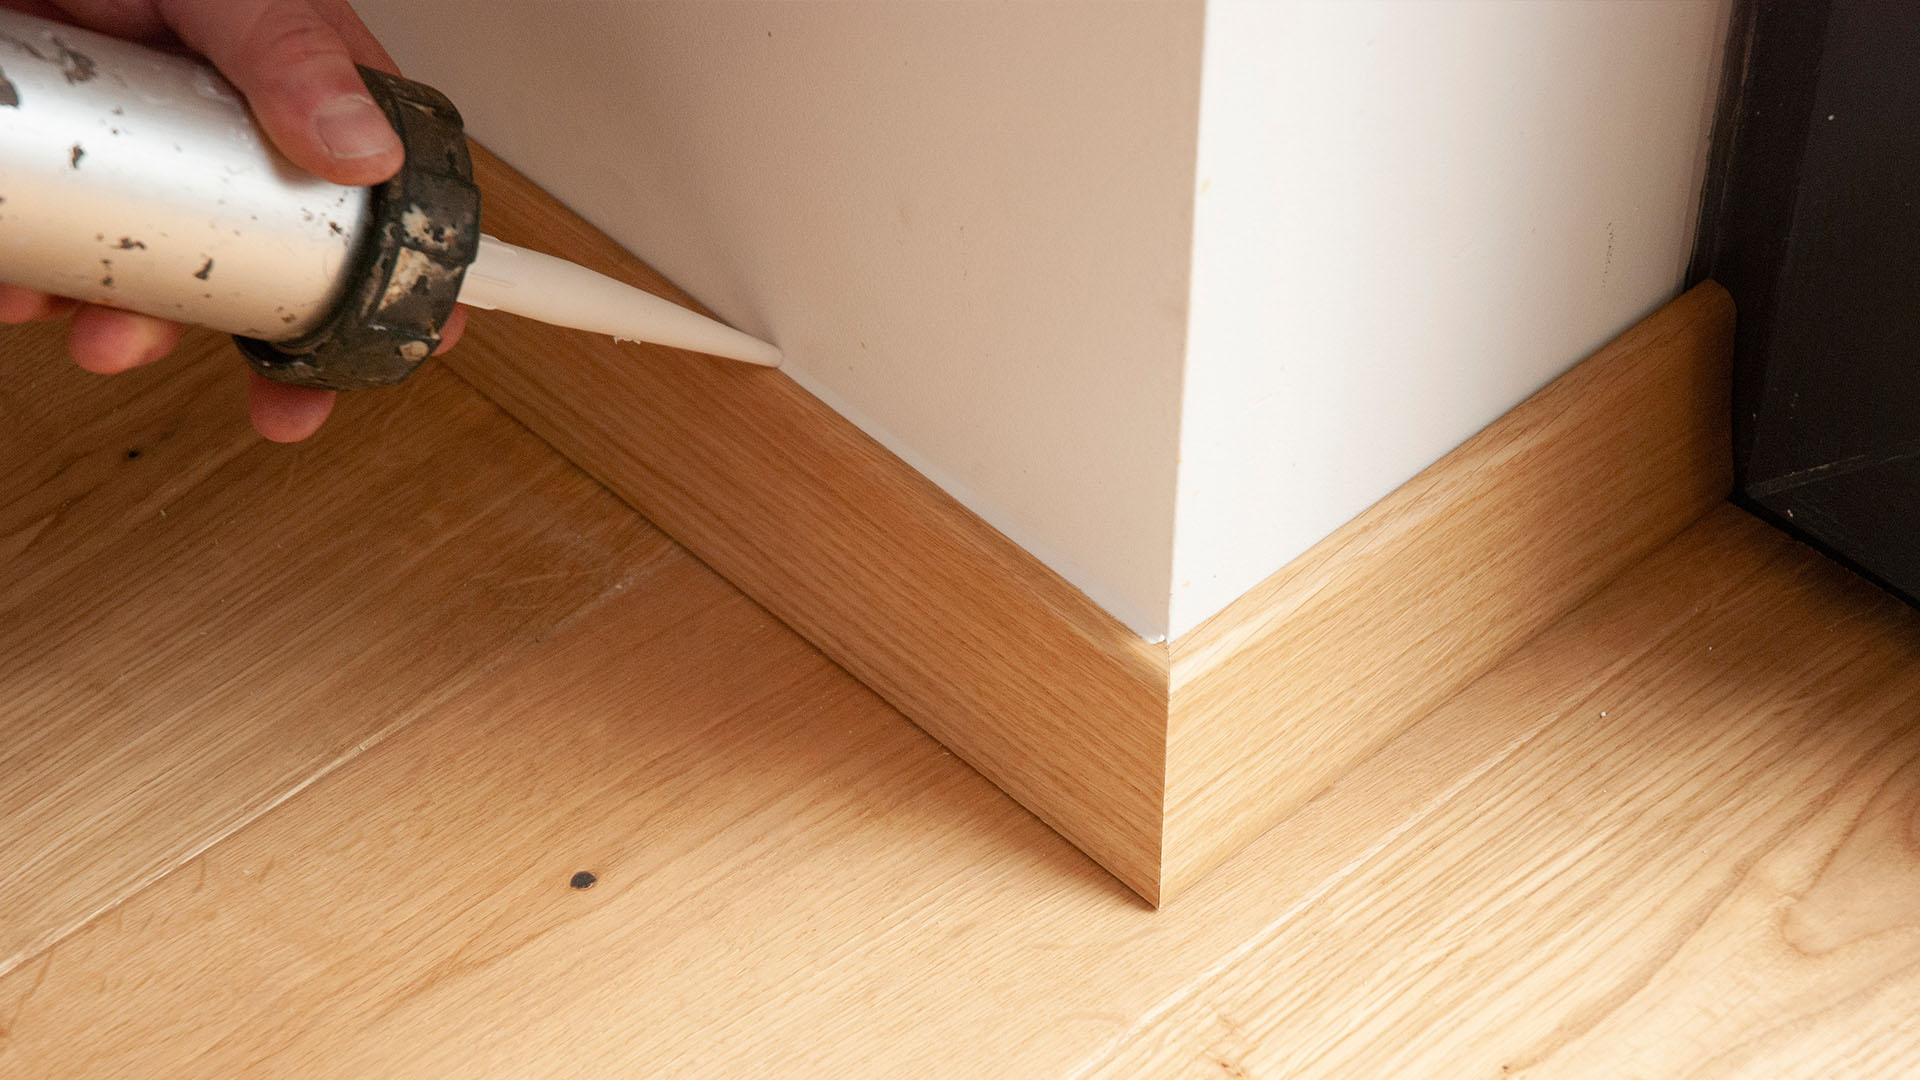
8. Fill any gaps between the molding and the wall with acrylic. For dark-colored walls, you can paint over the acrylic with the same paint to make it less visible. Any gaps between the molding and the wooden floor should be filled with parquet filler in a matching color.
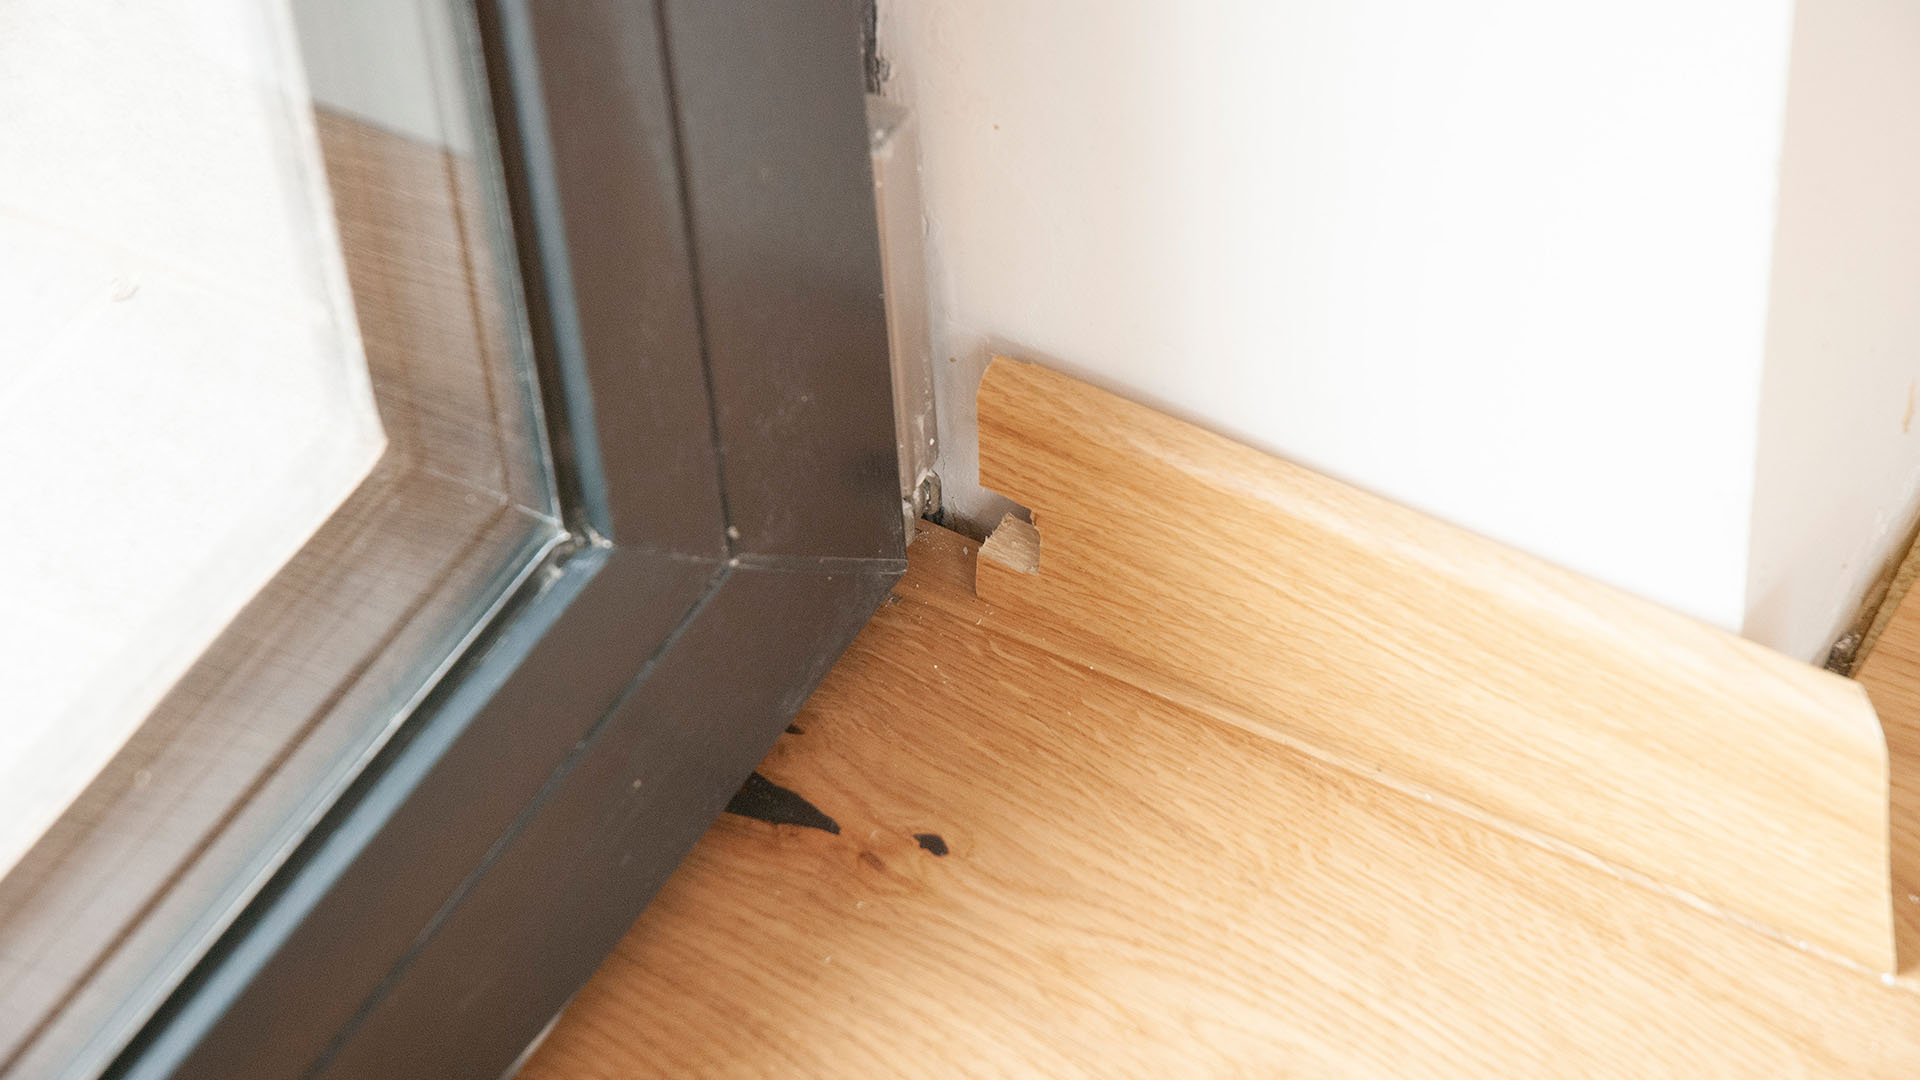
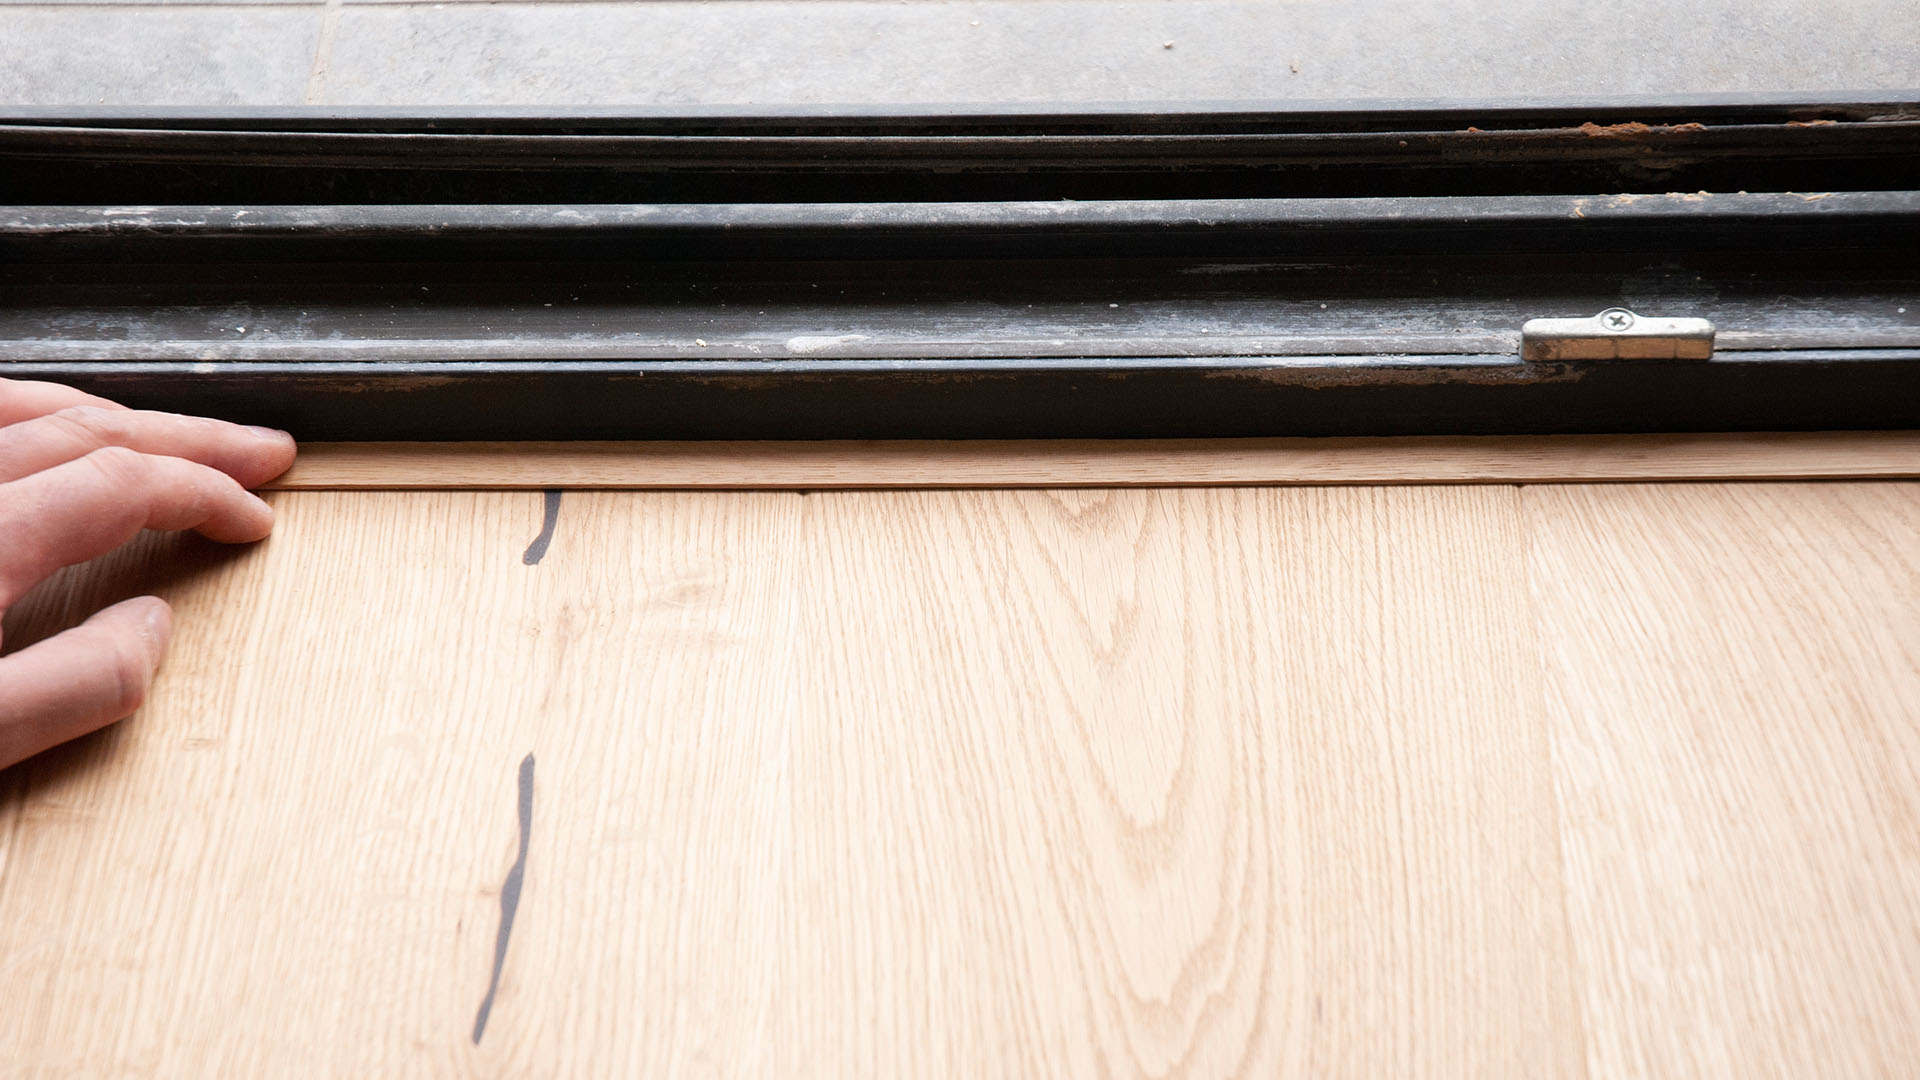
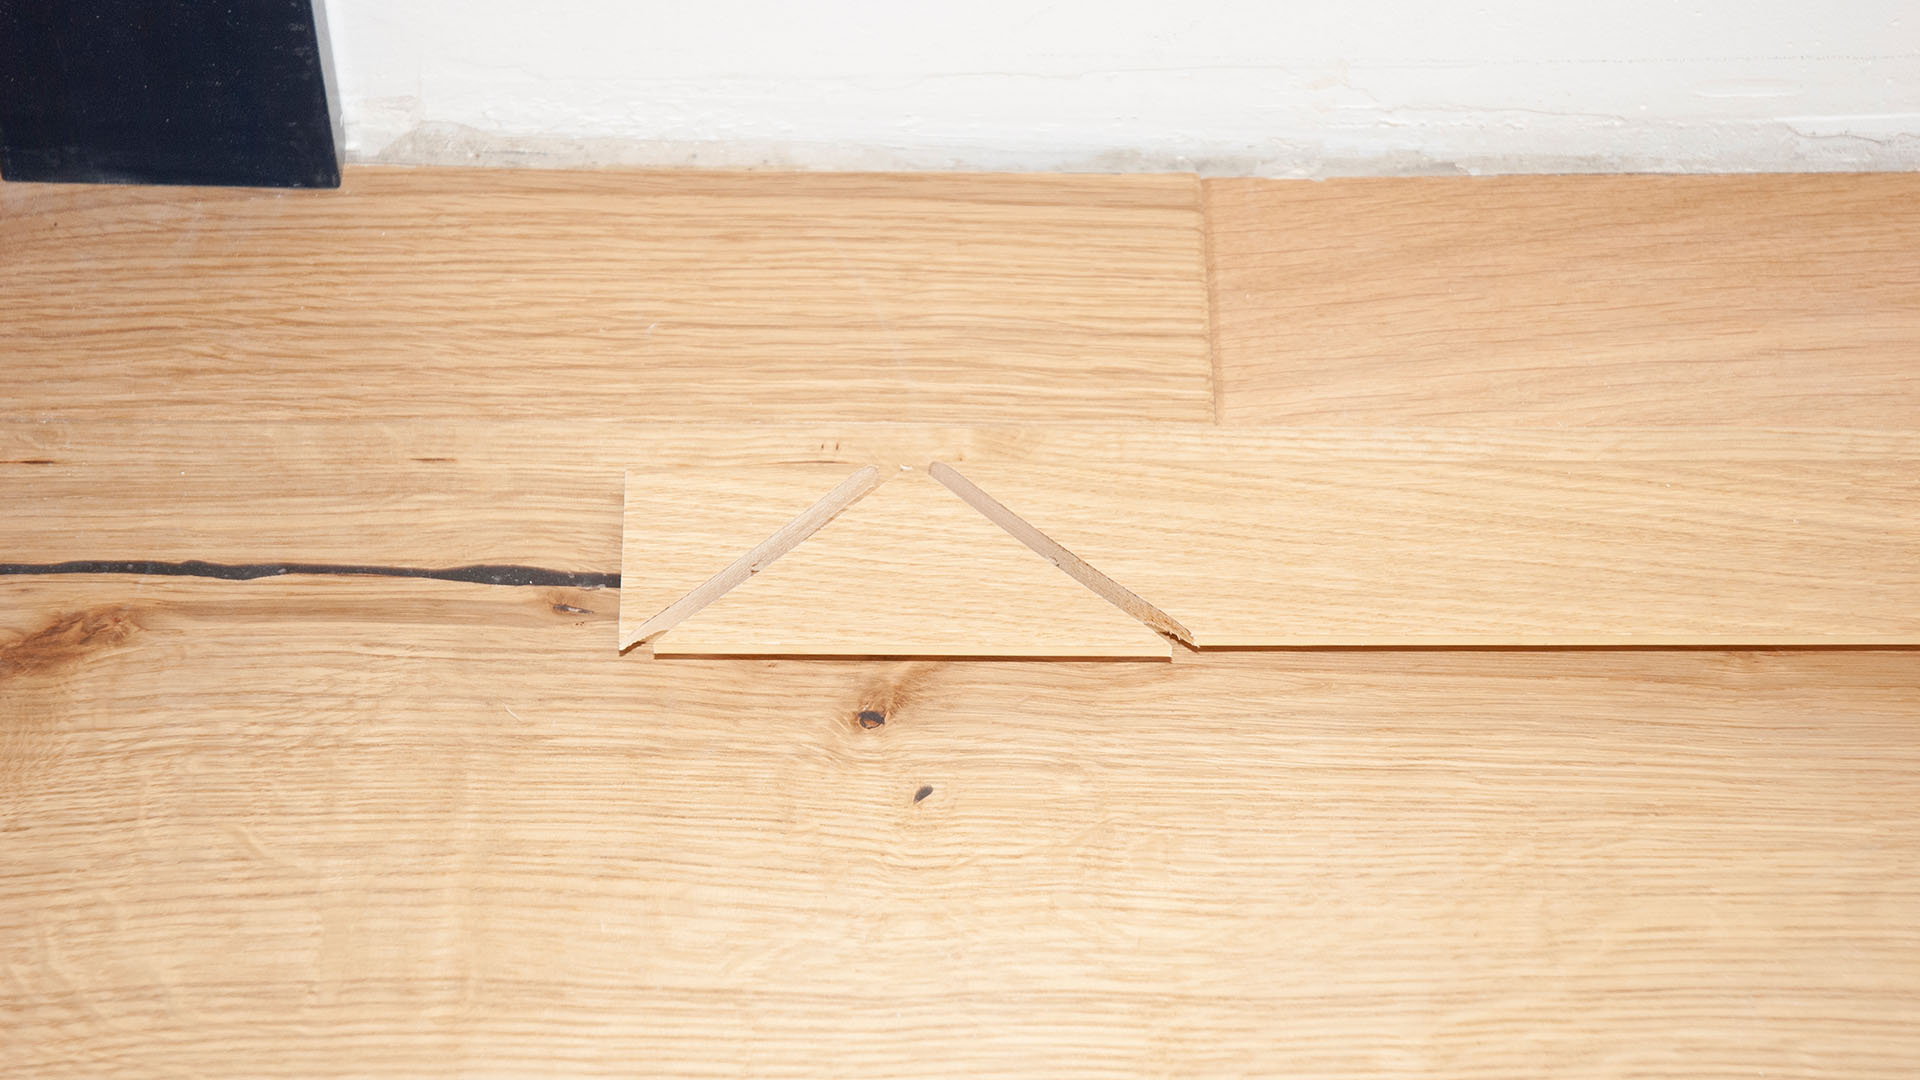
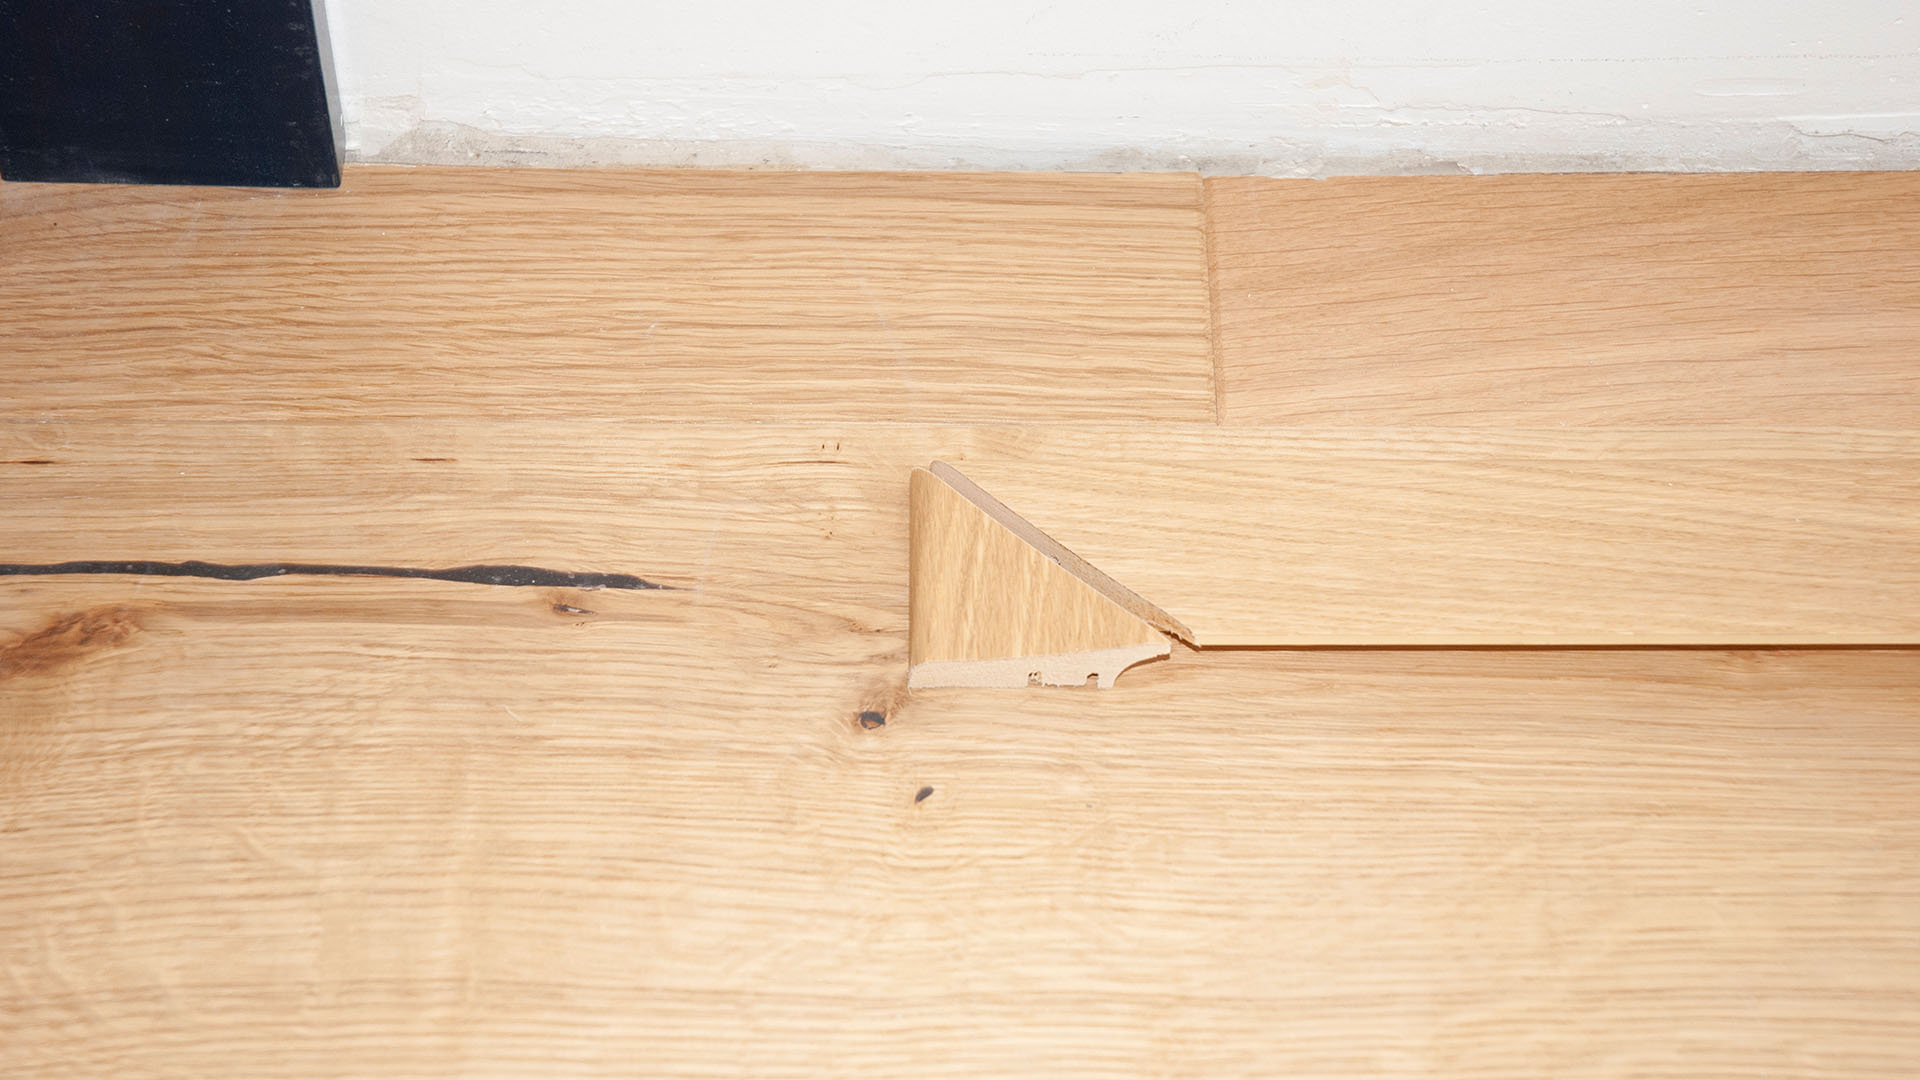
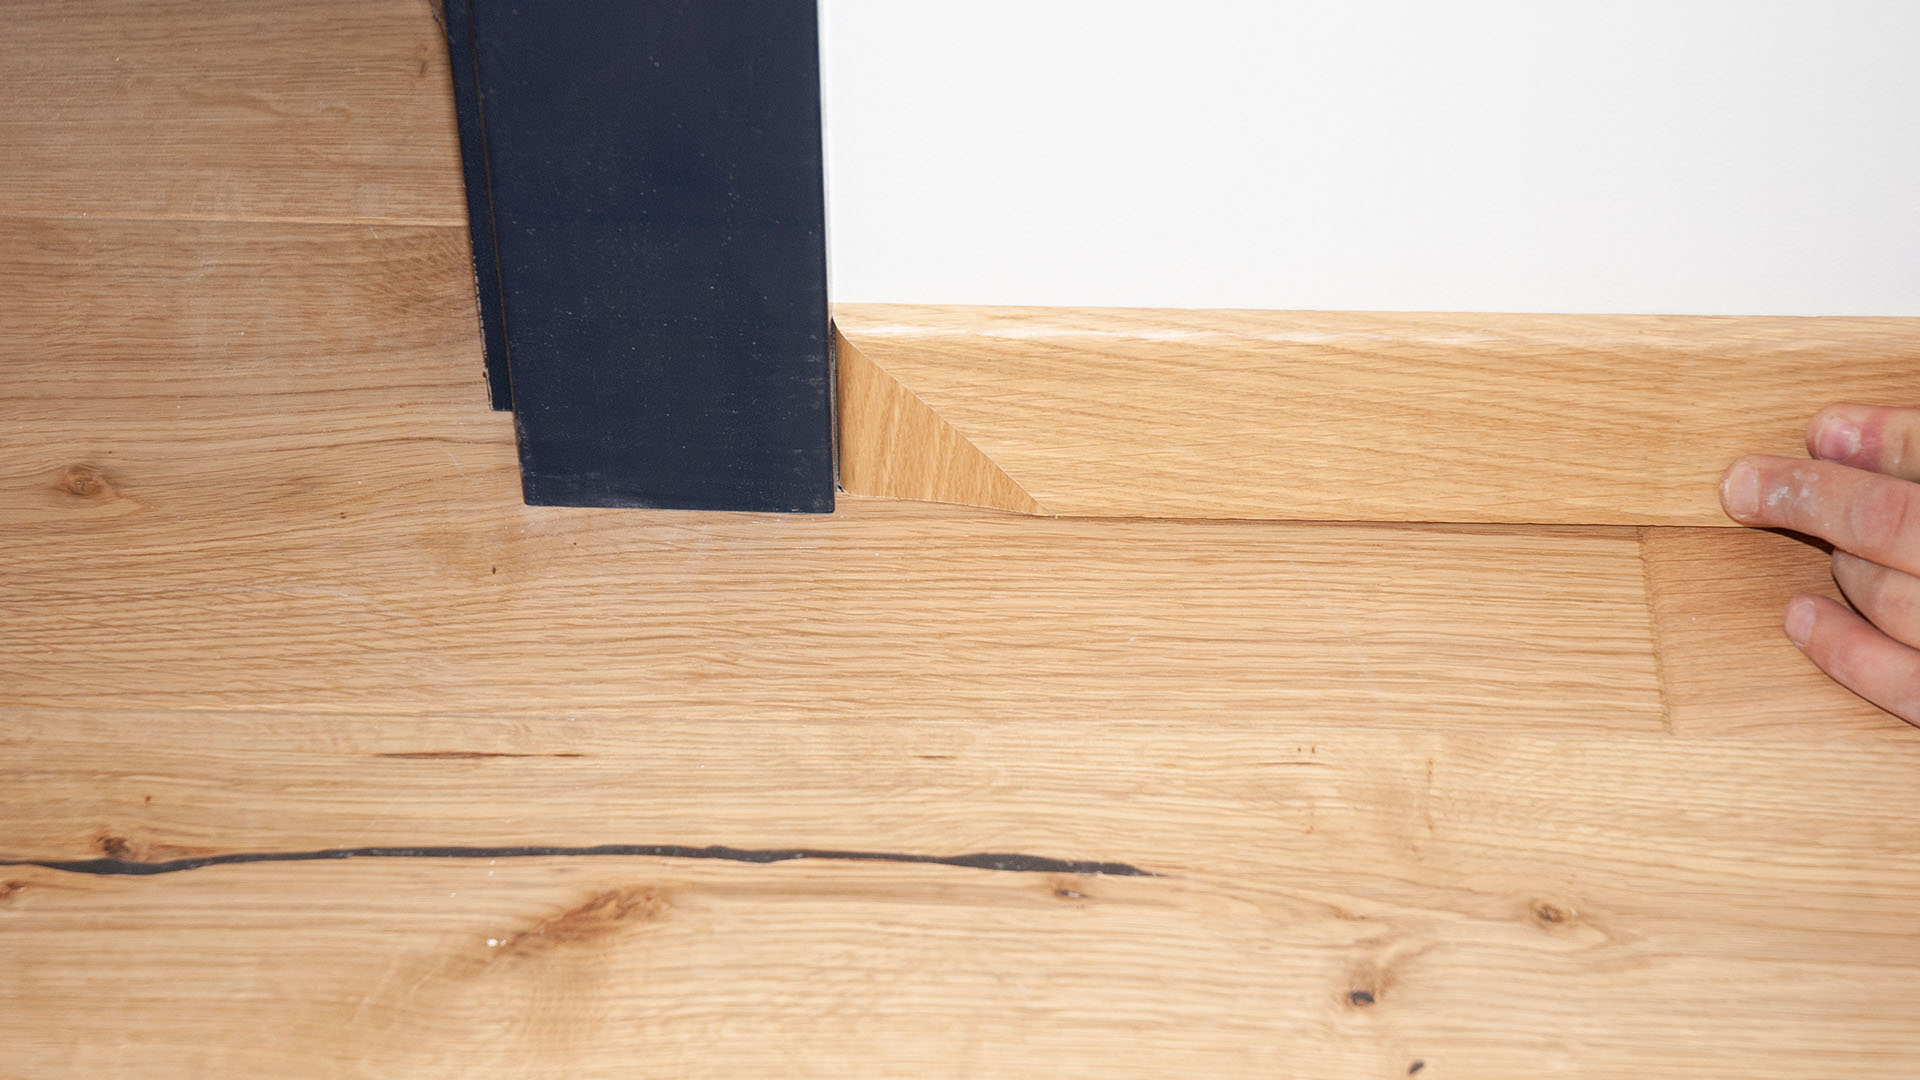
9. Before installing a molding near patio or balcony doors on the hinge side, check whether the thickness of the molding will interfere with opening the door. If it does, you can install a suitably narrowed molding in this spot or use quarter rounds instead.
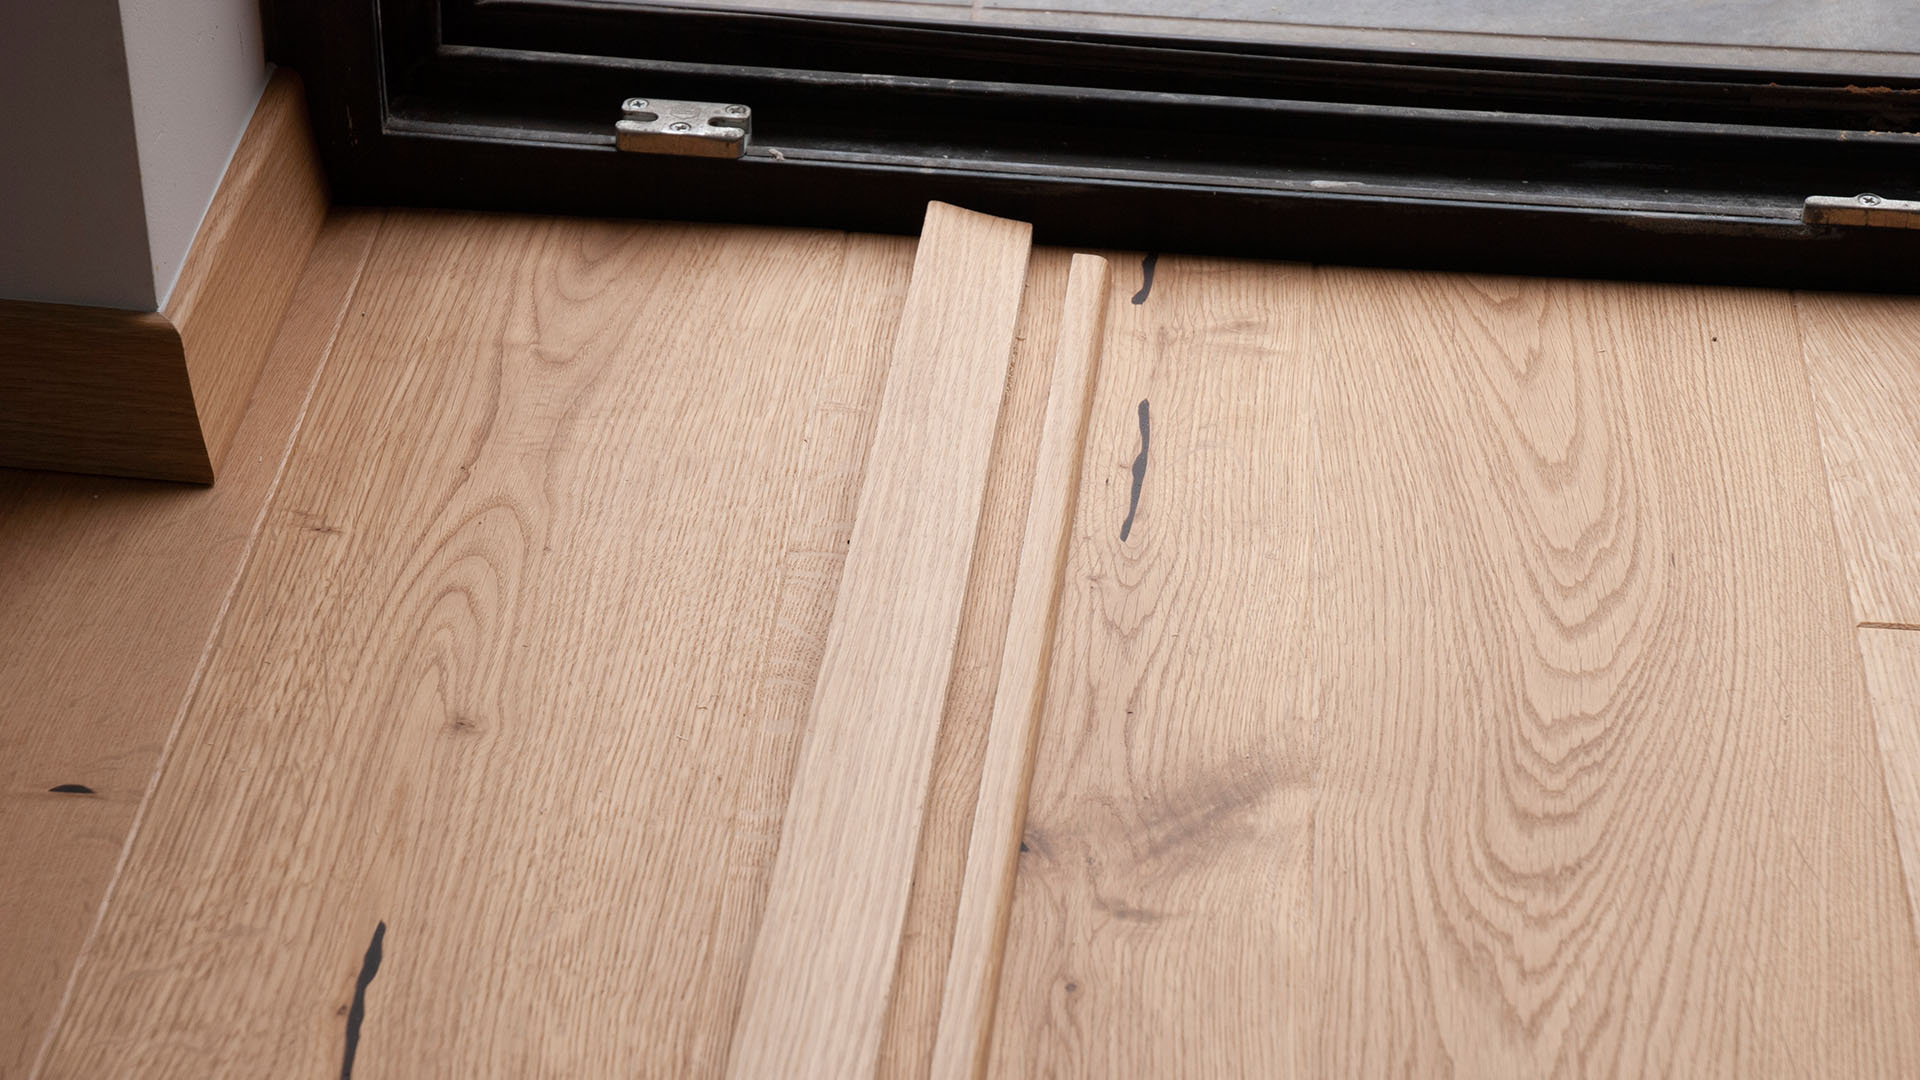
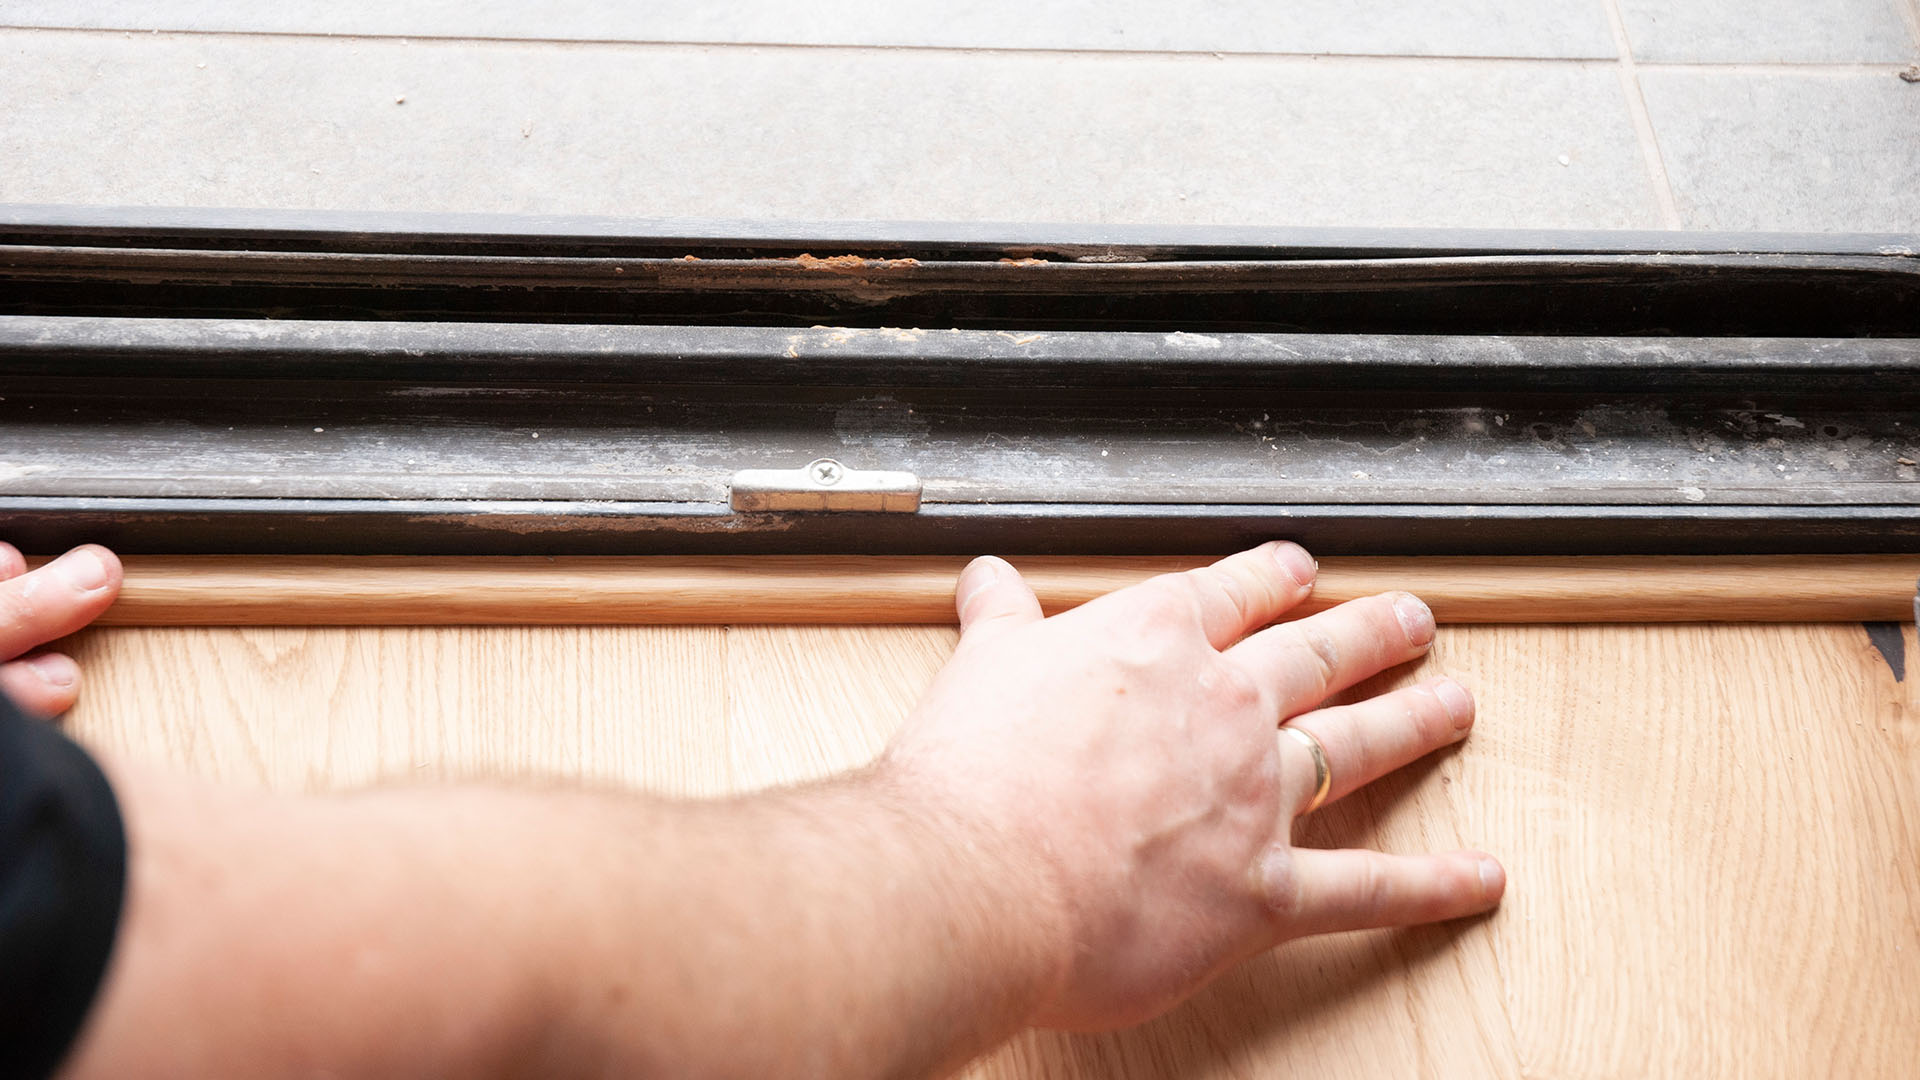
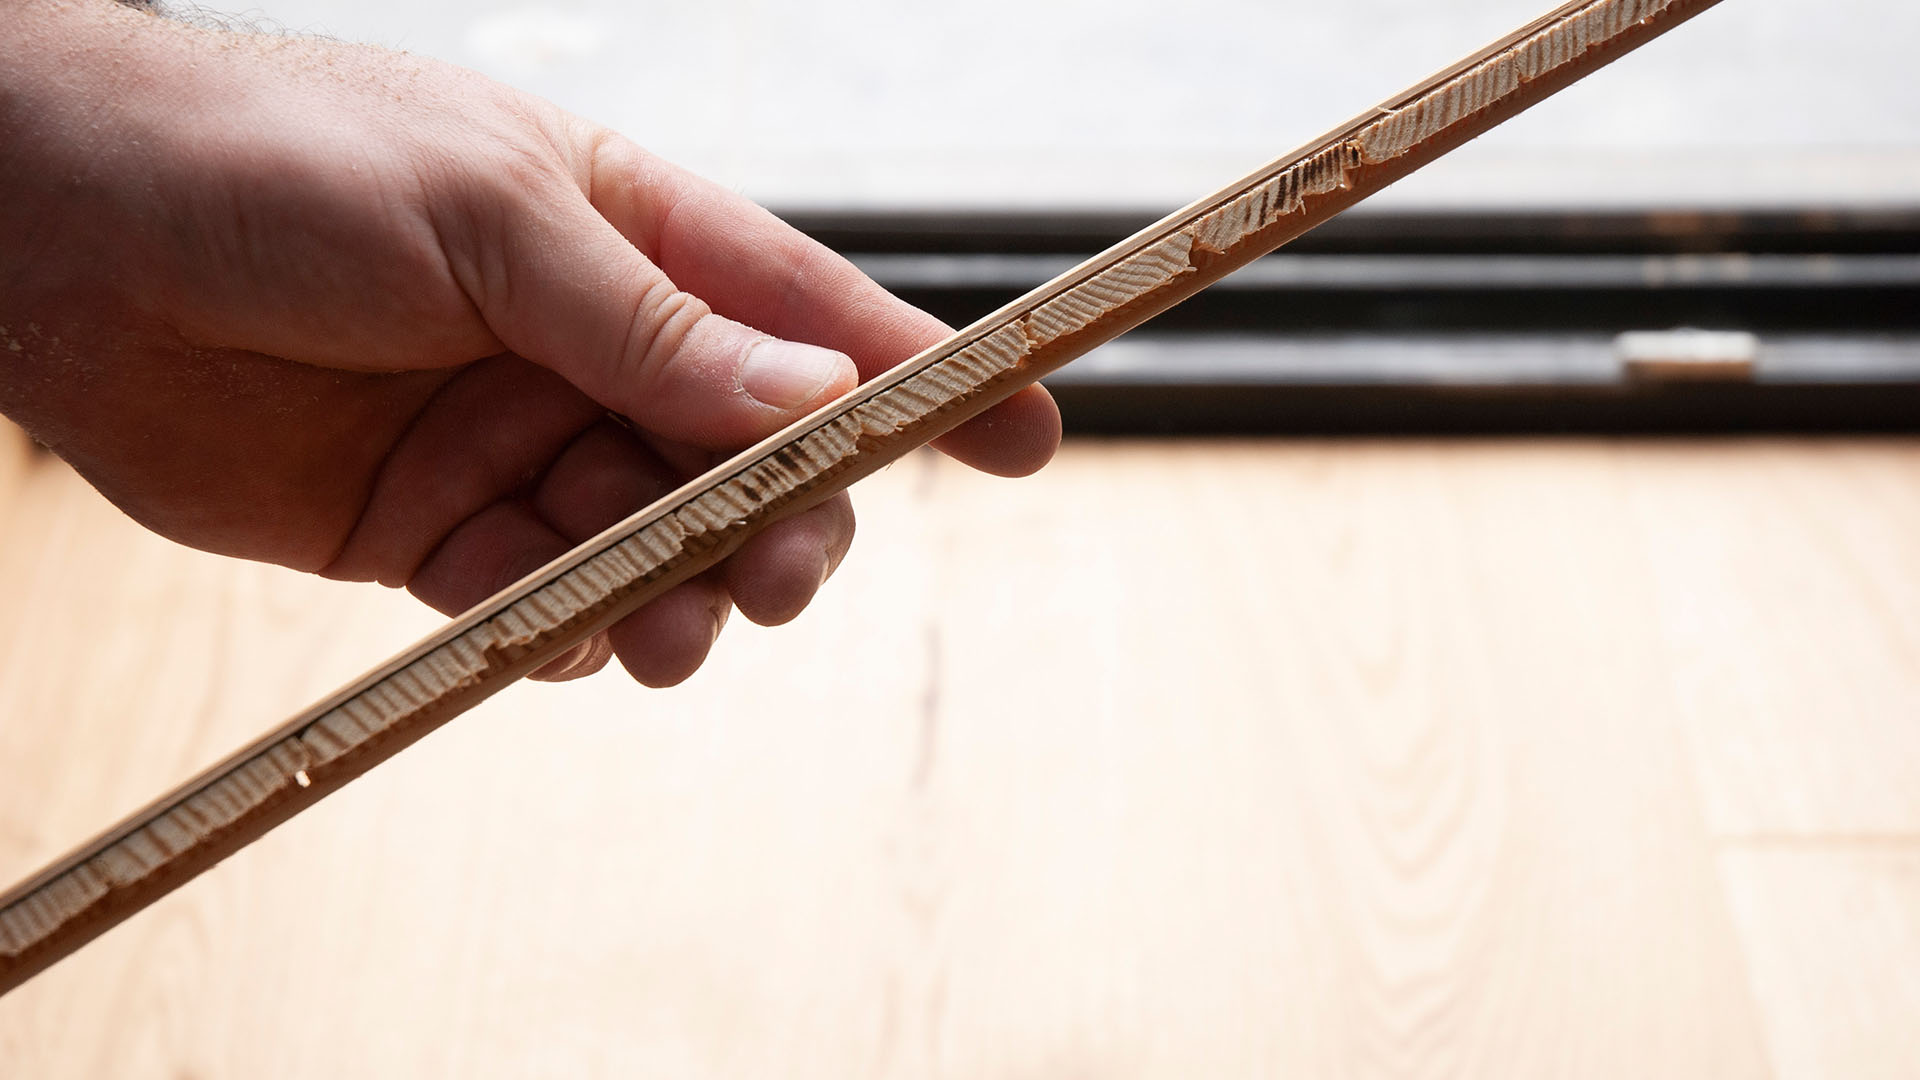
10. Expansion gaps near window profiles can be concealed by cutting quarter rounds from the molding or using a strip cut from a floorboard. The width of the masking element must be at least 10 mm wider than the expansion gap.
Wooden floor moldings – installation with clips
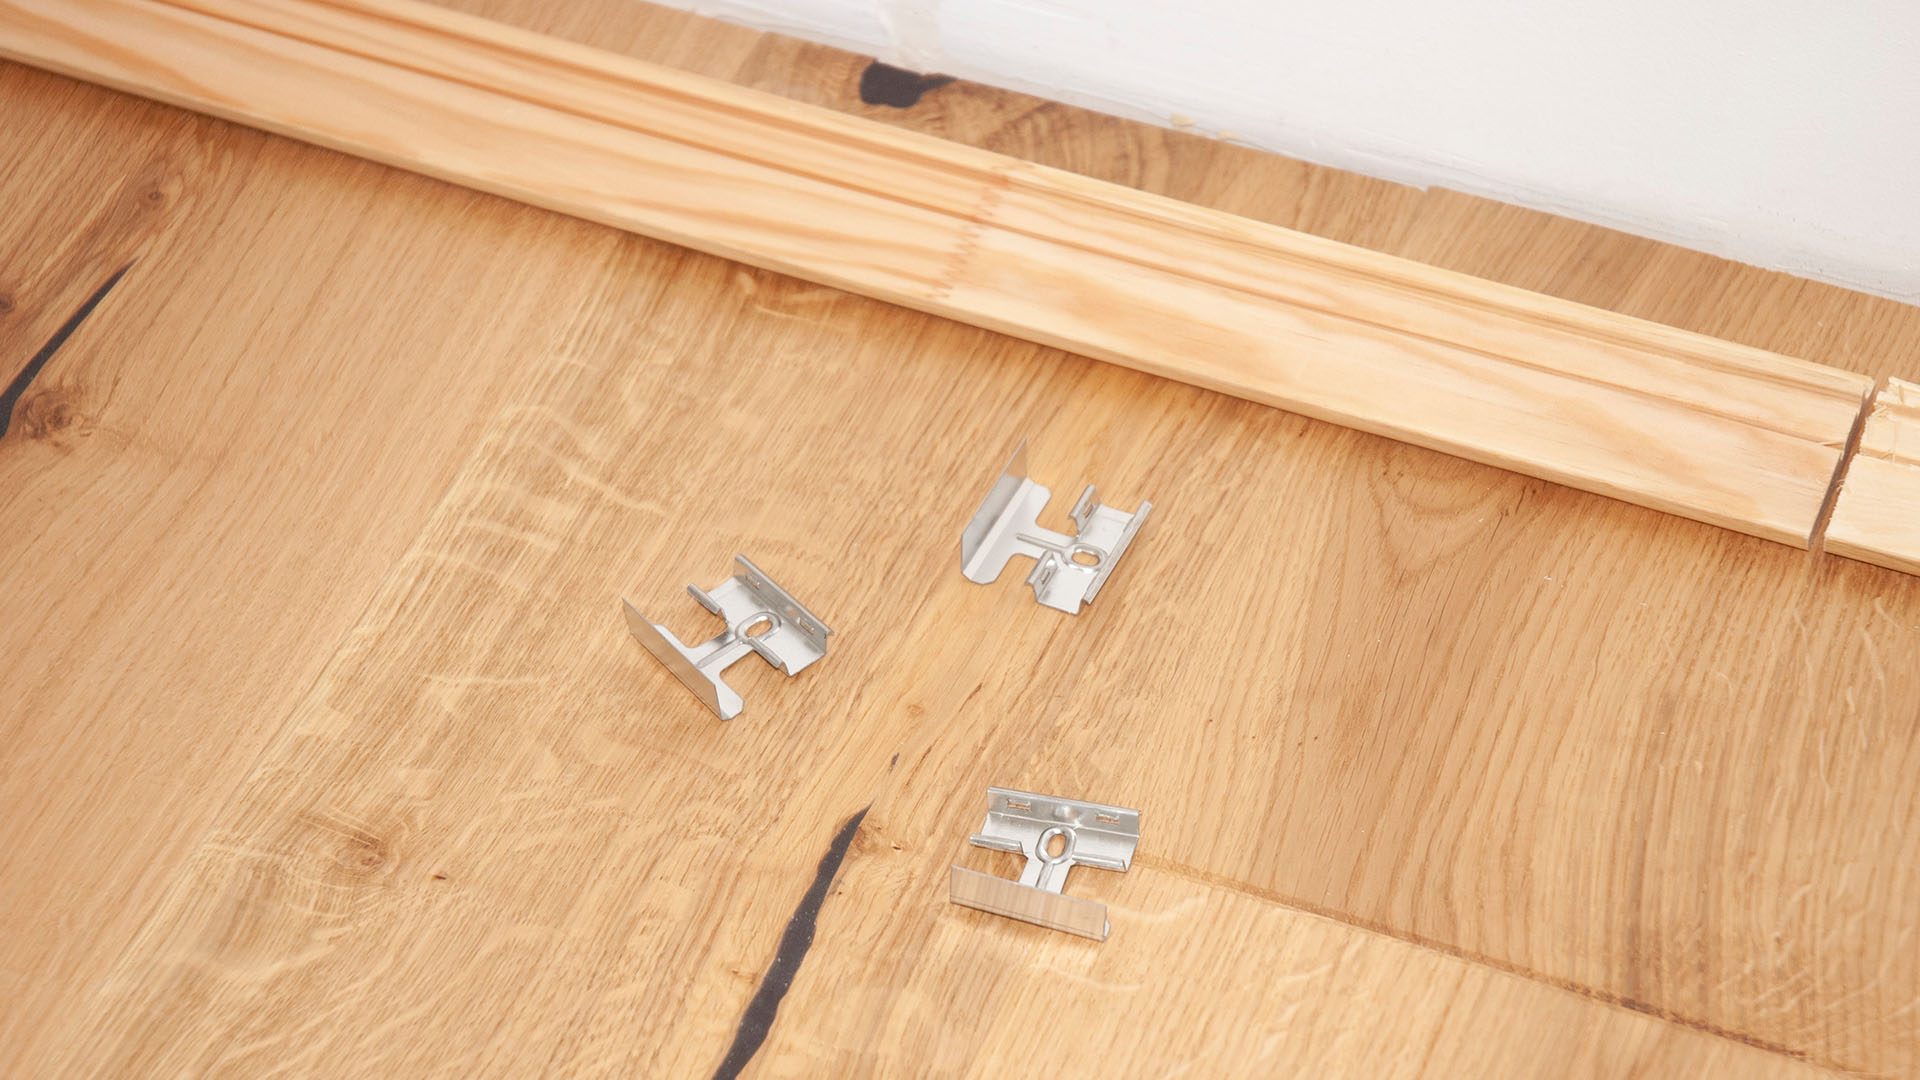
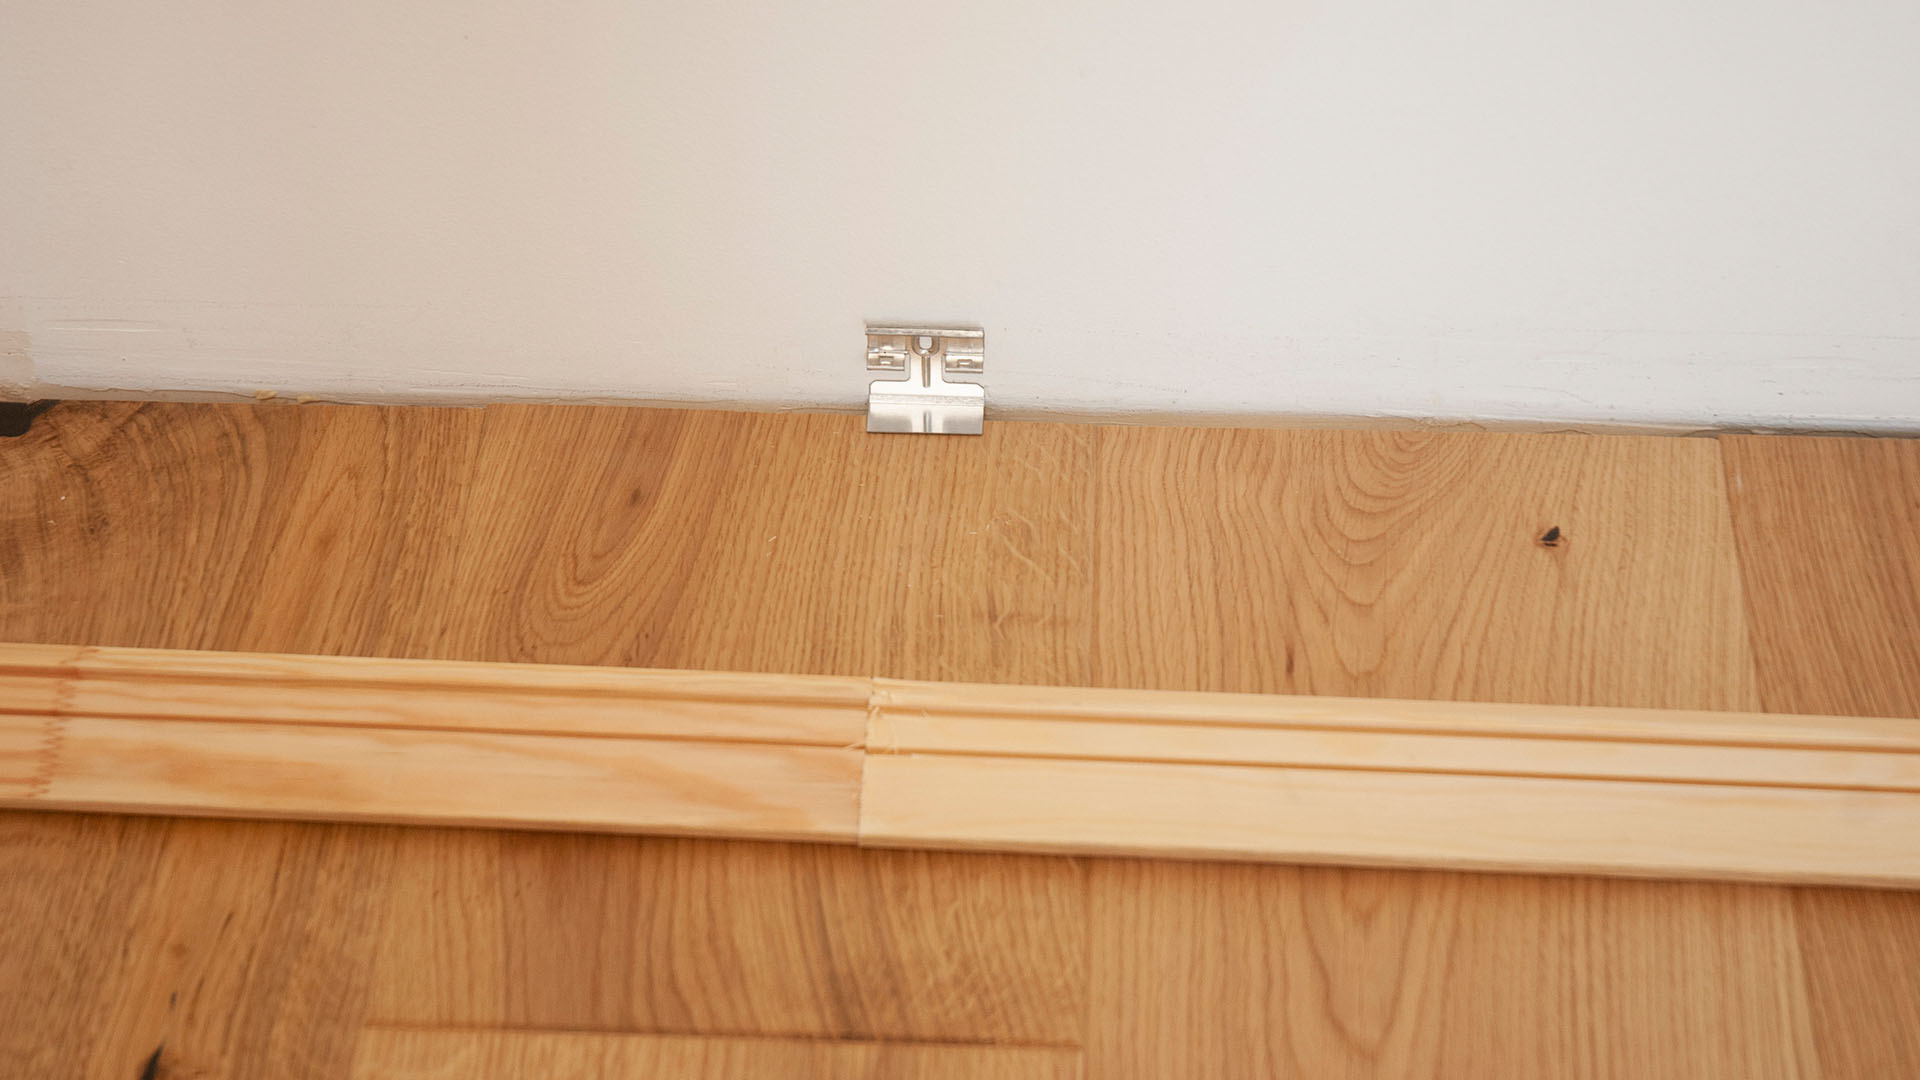
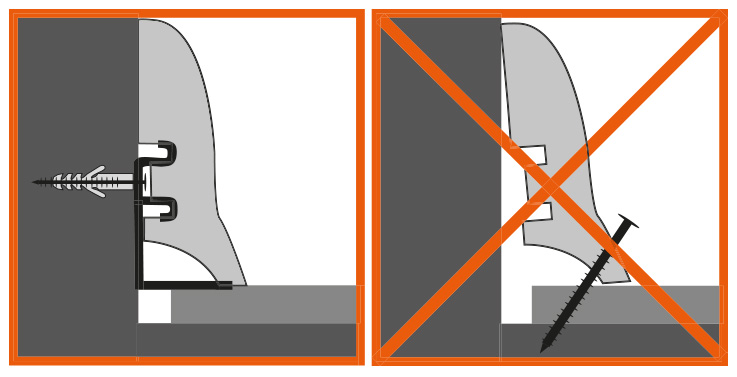
1. Floor moldings can also be installed using special clips from Barlinek’s range. This method allows for easier removal if needed, for example, when replacing cables hidden in the molding grooves.
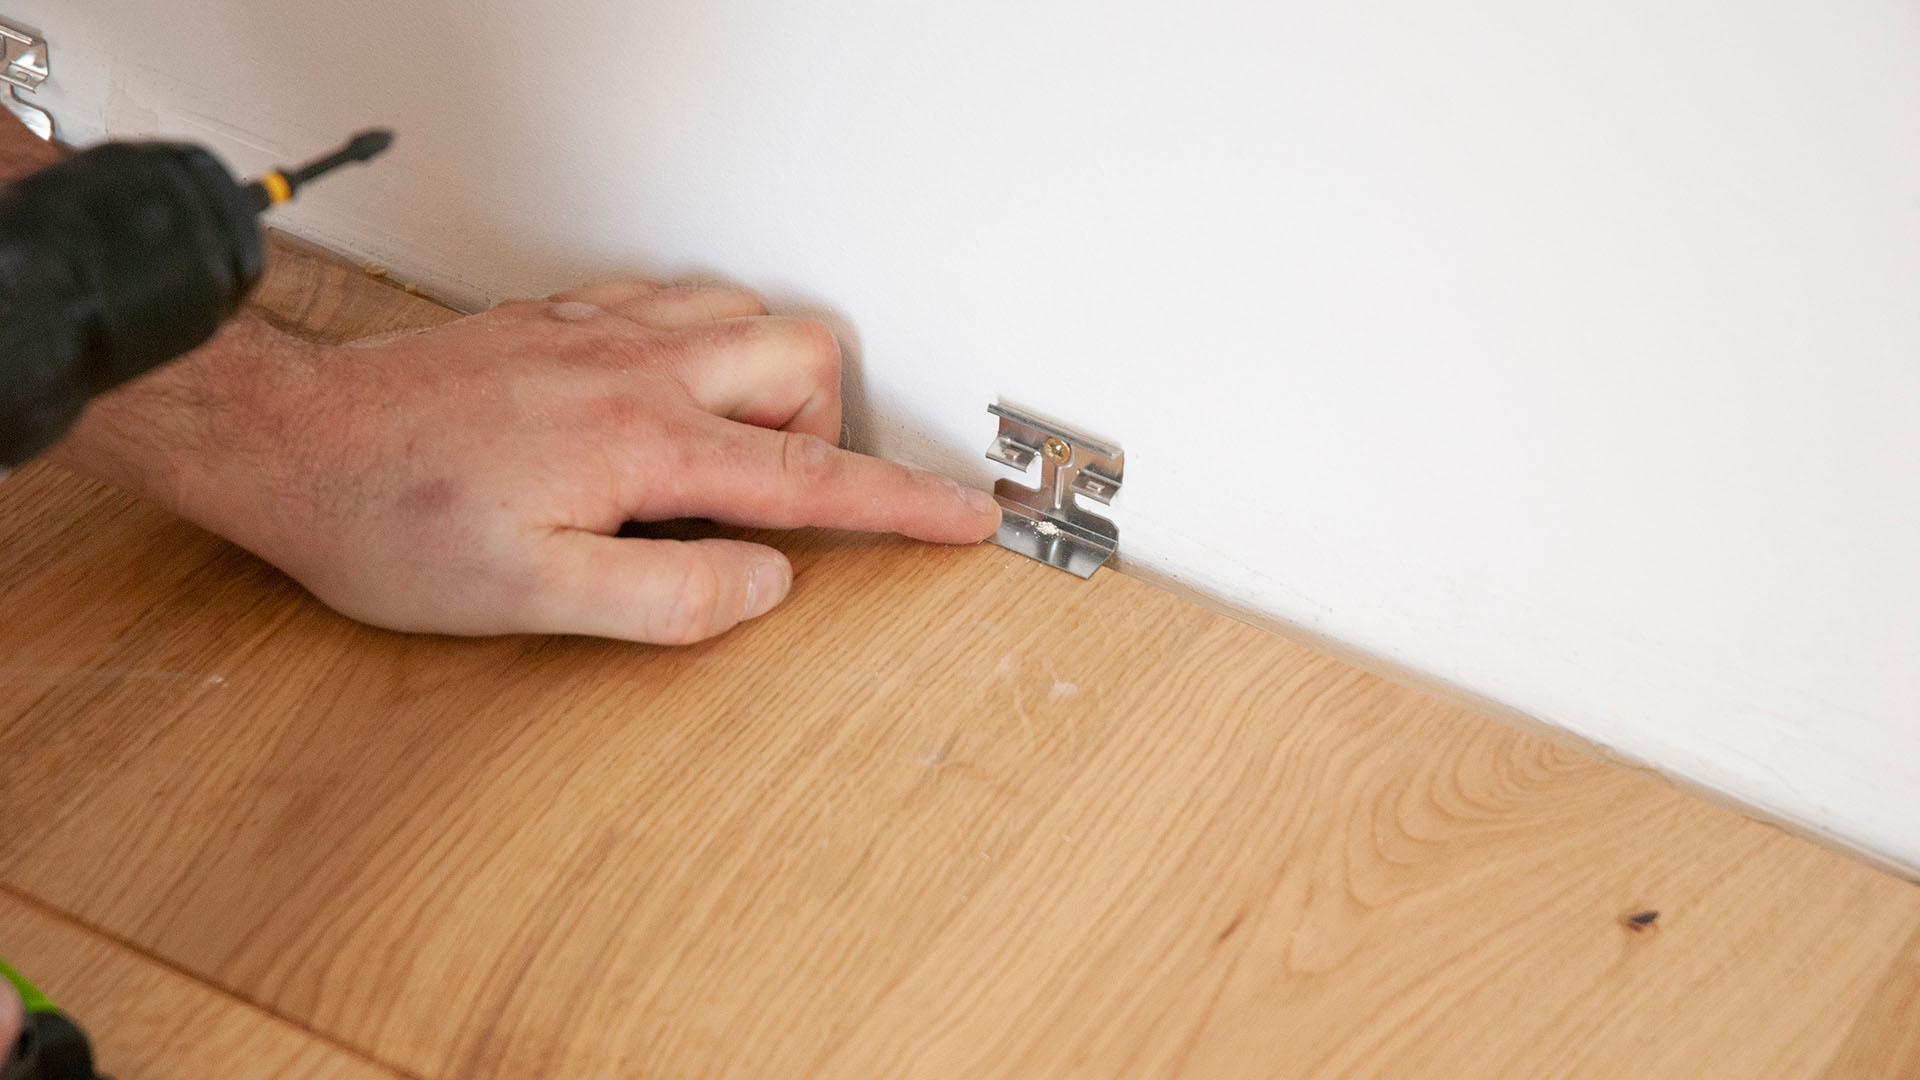
2. The clip set also includes mounting plugs and screws. For plasterboard walls, these should be replaced with screws and plugs suitable for this type of material.
3. Start installing the moldings with clips by cutting them to the correct length—this will help you determine the proper placement of the clips. The optimal spacing between clips is 25–50 cm; the more uneven the walls, the more clips you should use. IMPORTANT: A clip must be installed at every molding joint.
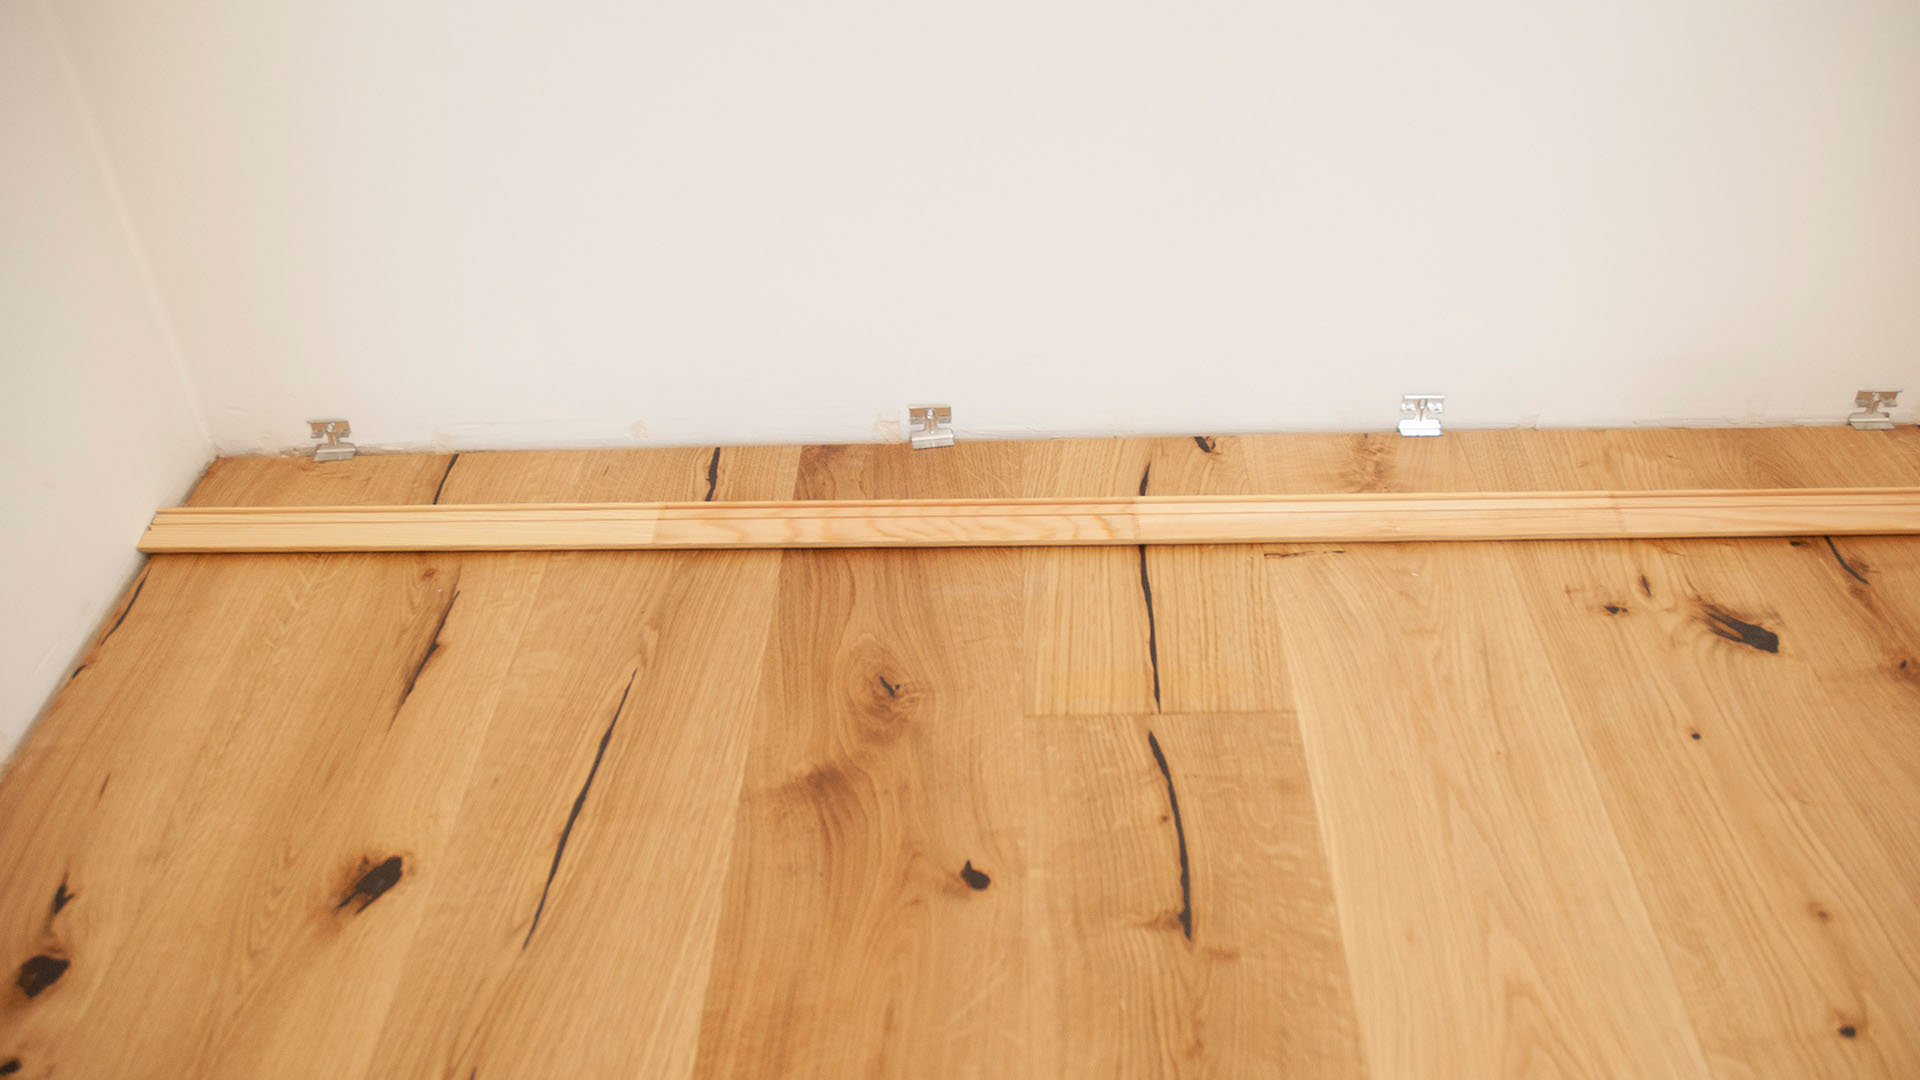
4. After marking the positions, drill a hole in the wall with a diameter of 6 mm and screw in the clips.
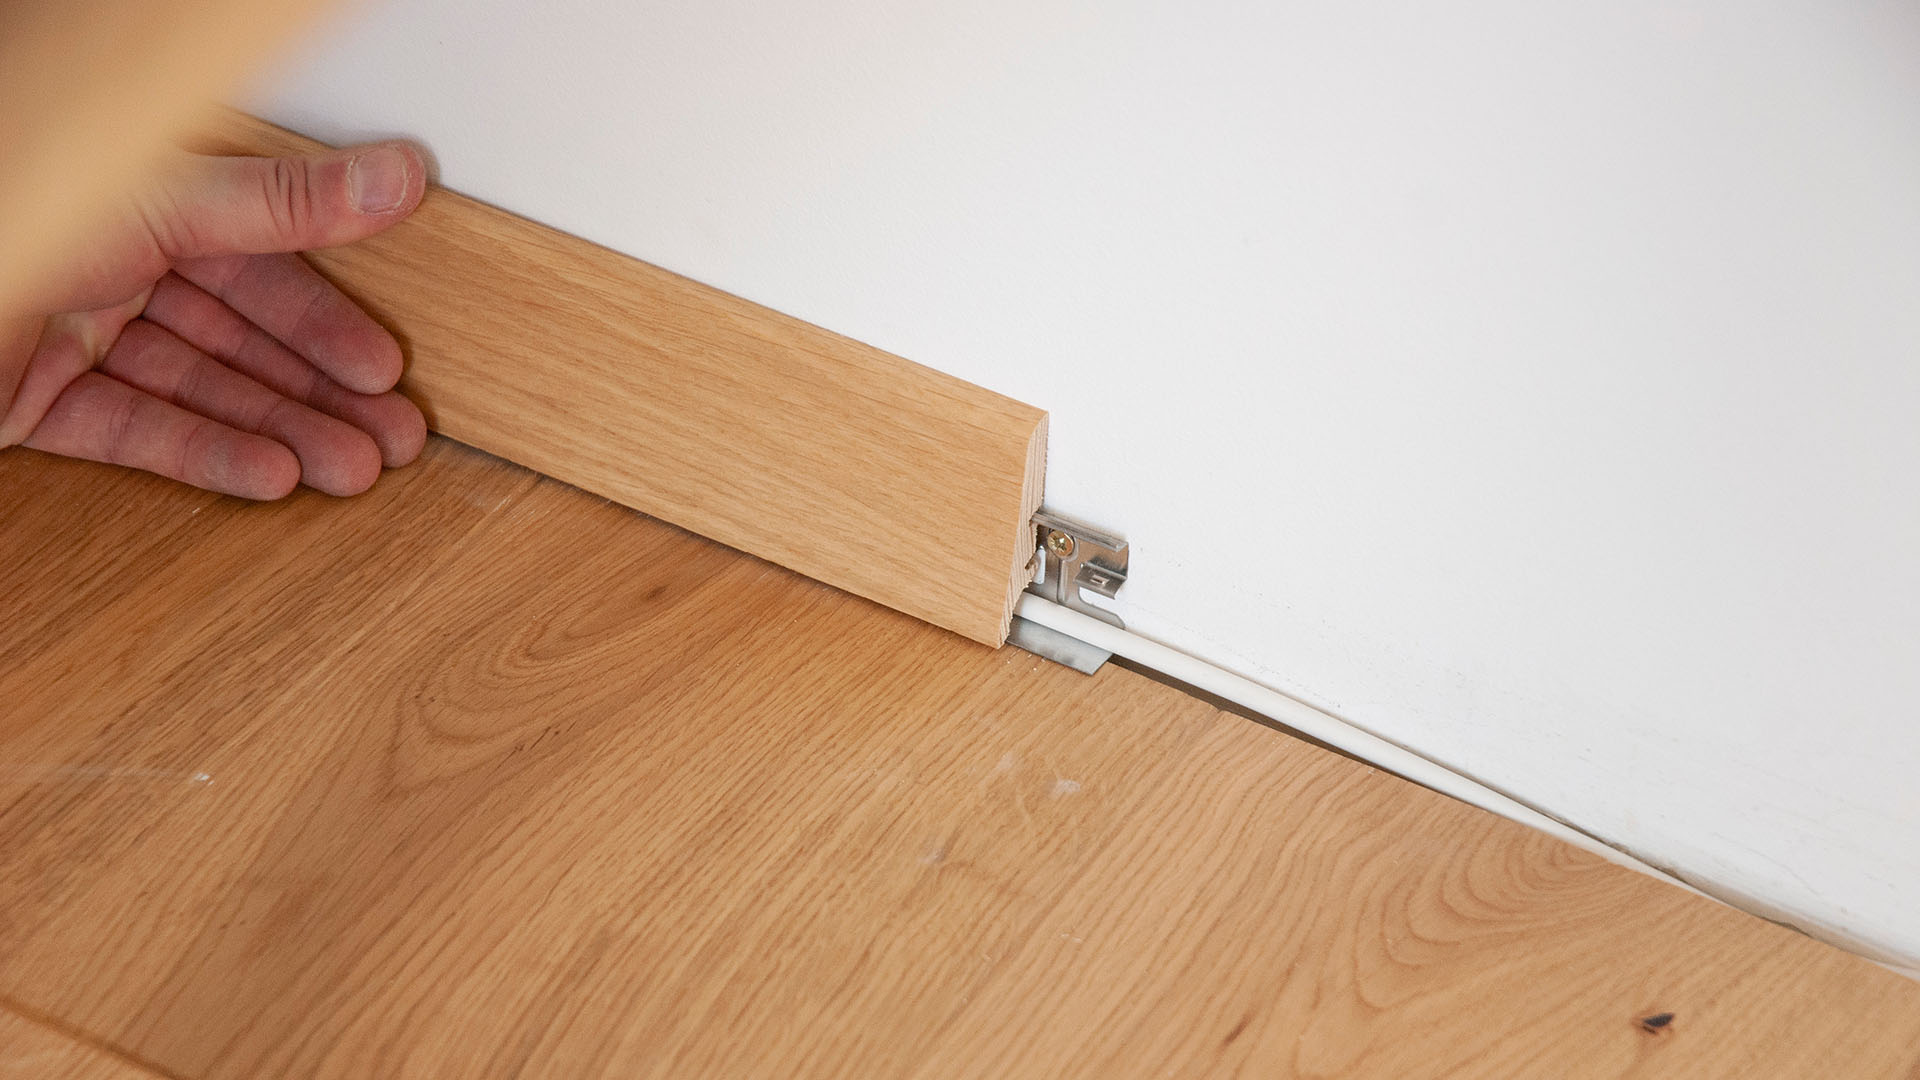
5. Clips also allow you to hide additional cables behind the molding—such as coaxial or speaker wires.
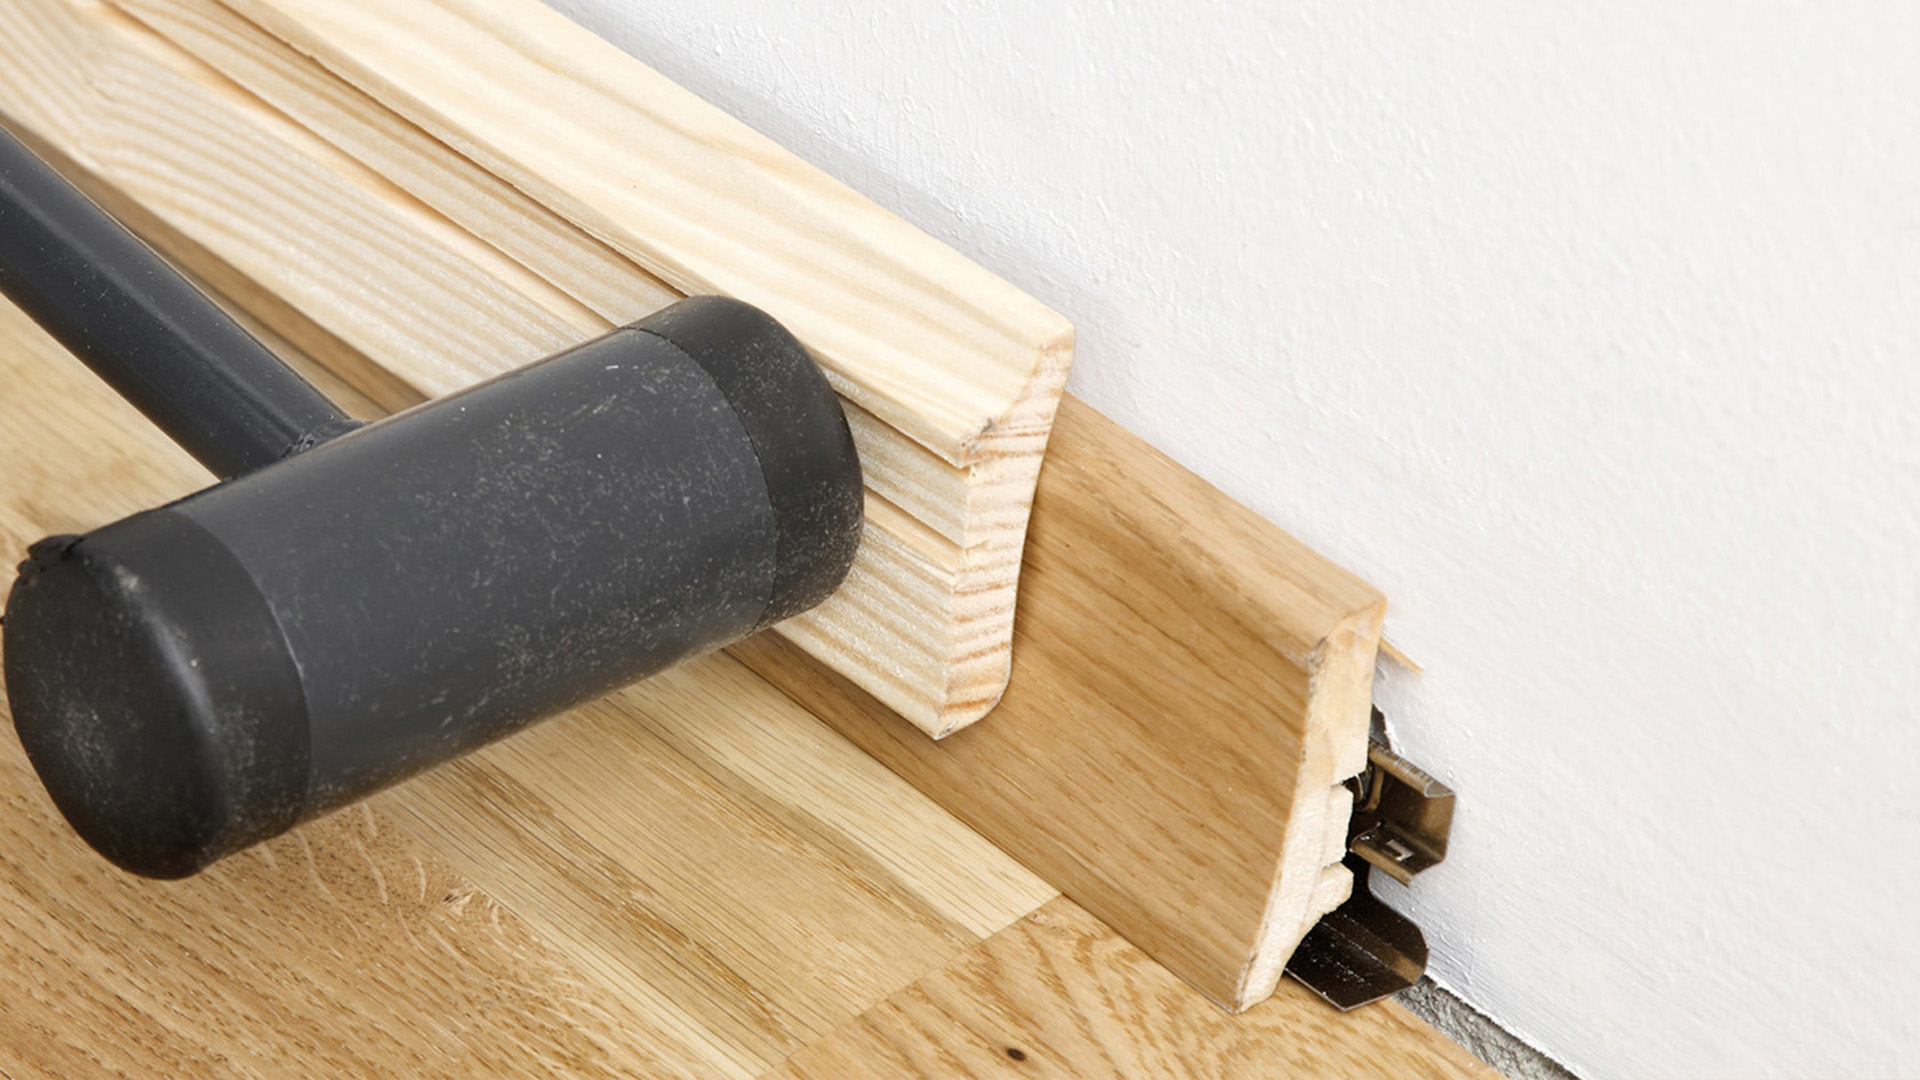
6. After installing all the clips, snap the moldings into them. You can gently tap them with a rubber mallet or use another molding as a buffer.
7. Near door frames, you can cut neat end pieces from the moldings for a clean finish.
IMPORTANT! Always remember to mount the moldings to the wall—never to the floor!