How to install three-layer hardwood floorboards with 5Gc locking system – floating
Before fitting the multi-layer hardwood floor, the developer/fitter or technician must ensure that the installation site meets all the applicable standards. Always comply with the recommendations of the building industry and local regulations. The manufacturer accepts no liability for improper working conditions on the installation site. Before installation the developer/fitter or technician should inspect the multi-layer hardwood floorboards and confirm that they comply with the purchase order. The floorboards should be fully inspected and checked for the grade, quality, finish, gloss and color. The developer/fitter or technician is fully responsible for the final quality control of the multi-layer floorboards. If in doubt, the developer/fitter or technician should not use any of the boards considered to be unsuitable for installation and should contact the seller immediately. When ordering the floor, a waste factor up to 7% should be taken into account. If the boards are to be laid diagonally or connected along a curved line with other floor types, a waste factor of up to 10% should be taken into account. The manufacturer accepts no responsibility if the floor is laid outdoors, in bathrooms, in areas exposed to relative humidity levels other than from 45% to 60%, in areas exposed to direct contact with water or other liquids, in areas where the temperature is other than from +64.4°F to +75.2°F (+18°C to +24°C). The final inspection by the end user should be carried out while in the standing position. Barlinek wooden floors can be used only in rooms not exposed to flooding with water.
Engineered wood flooring installation step by step
1.
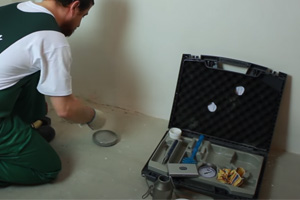
The moisture content of the wooden substrate (wood-based panels) should not exceed 9%. The moisture content of the concrete substrate should not exceed 2% and that of the anhydrite substrate – 0.5%. The moisture content of the substrate should be measured using the car¬bide method. The measurement results should be recorded.
2.
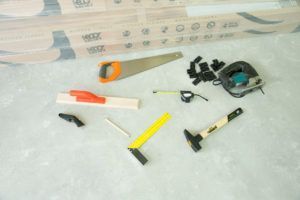
Recommended tools and materials for floor installation:
- Safety goggles
- NIOSH-certified dust mask
- Wood/concrete moisture meter
- Spatula for removing residues from the substrate
- Steel hammer 1.5lbs to 2.5lbs (800 g to 1000 g)
- Vacuum cleaner or sweeping brush
- Expansion wedges
- Tapping block
- Tape measure
- Pencil
- Mitre saw or table saw
- Trimmer
- Knee pads
- Protective gloves
- Floor shunting tool
- Carpenter’s square
3.
Clean – free of dirt, cement, putty, plaster, paint, oil, glue or other residues. Floors are not suitable for installation on substrates cleaned by chemical methods. Multi-layer boards can be fixed to the wooden substrate such as solid wood boards, OSBs or other boards specified below. This substrate should be permanently fixed to the subfloor (e.g. wooden beams) using staples or nails. Any “squeaky” areas should be fixed by nailing or screwing them down prior to installing the new floorboards. The spacing between the fasteners fixing the wooden substrate to the beams should be about 6” (15 cm). Any delaminated, swollen and damp panels should be replaced with new ones. The spacing between the beams under wood-based panels should be in accordance with the relevant building regulations. The moisture content of the wooden substrate should not exceed 9% when measured with needle meter. As a manufacturer of multi-layer hardwood floors, we are not able to assess every underlay on which the floor is to be installed. The responsibility for choosing the spacing and distances, and assessing the substrate lies with the developer, engineer, architect or consumer, who are in a better position to evaluate the expected result based on test results for the floor installation area.

4.
The purpose of the recommendations for the quality of the substrate is to ensure the correct installation of multi-layer floorboards. They are in no way intended to replace any federal, state or local building regulations.
Multi-layer floor can be laid on substrates which meet the following standard requirements:
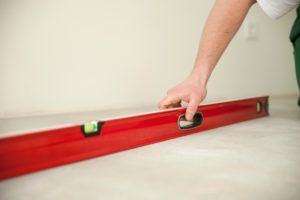
Flat – the maximum unevenness of the substrate should not exceed 1/8” (3 mm) over 6.56 ft (2 m) when measured with masonry patch. Any recesses or uneven areas should be filled with special materials designed for this purpose. The maximum horizontal offset over the entire floor area must not exceed 3/16” (5 mm).
Dry – concrete substrates should be cured for at least 60 days. The moisture content of the concrete substrate should be tested using the calcium carbide test (carbide method) and the result must not exceed 2 % for concrete substrates and 0.5% for anhydrite substrates. The moisture content of the wooden substrate (wood-based panels) should not exceed 9%.
5.
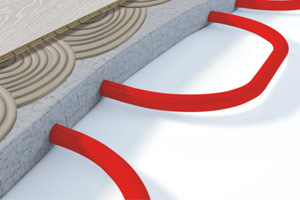
Installation over water underfloor heating When fitting multi-layer floorboards over water underfloor heating, the screed heat-up procedure should be performed. The procedure involves heating up the floorboards at regular intervals to eliminate any residual moisture from the screed and to avoid the risk of hazardous stress in the underlay. For the screed heat-up procedure, see www.us.barlinek.com. Following the underlay heat-up process, you can start laying the floor. Two installation procedures can be used for fitting floor over underfloor heating: floating and glue-down installation. It is not advisable to exceed the threshold of 29°C (84°F), when adjusting the temperature of heating on the floorboard surface.
6.
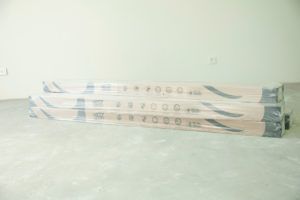
The packs containing floorboards must be handled carefully during transport and unloading to avoid any mechanical damage. Floorboards in the original packaging should be kept in a dry place, in a horizontal position, on pallets or wooden beams to provide free space of at least 75 mm (3”) between the boxes and the subfloor. Before the floor is delivered to a building provided with doors and windows, all “wet” works must be completed, e.g. plastering, construction of partition walls, screed application, skimming, painting, etc. These works must be finished and any wet materials must be at the same humidity level as during the normal use of the area. If there are any cellars below the floor installation area in the building, they must be dry and well ventilated. Multi-layer hardwood flooring should be kept in the original packaging in the room where it is to be laid for at least 48 hours to ensure the floor is acclimated. Additional air-conditioning systems installed in the house or dwelling should be activated at least 14 days before, during and after the installation of the floor. The relative humidity in the area where the hardwood flooring is stored and installed should be kept between 45% and 60%. The air temperature should be between +64.4°F and +75.2°F (+18°C to +24°C).
7.
After vacuuming the screed, you need to place the underlay upon which the floor will be laid down, e.g. natural cork in rolls. Remember to leave a gap of 7/16’’ (11 mm) between the cork and the wall. Leave a gap of 2-3 mm between adjacent cork mat strips. Other underlayment materials, e.g. pressed natural wood fibre boards, are to be handled likewise.
Spread the underlay under the floating floor. Read the underlay installation guide and follow the instructions provided there.

8.
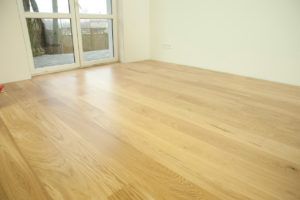
The direction of the laying of the Barlinek board is determined by the dimensions of the room and the direction of sunlight. If none of the walls is longer than 8 m, it is recommended to lay the floor towards the light, i.e. parallel to the window letting the most sunshine in. In the case of dimensions exceeding 8 m, or long and narrow rooms, e.g. corridors, the boards should be always installed along the longer side.
The maximum dimensions of the floor without intermediate expansion gaps are 66 ft (20 m) x 26 ft (8 m), (66 ft (20 m) along the longer edge of the board).
9.
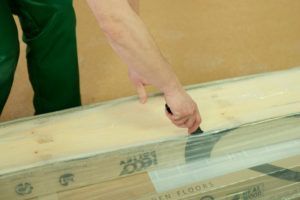
Cut the boxes with the boards from the bottom with a knife in order not to damage the top layer of the board.
10.
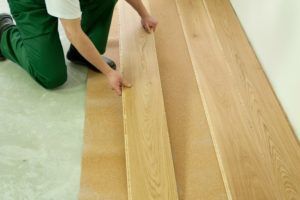
How to lay Barlinek board? Please remember that the wooden layered board is 100% wood and each of them looks unique. Before the installation, spread the boards and plan the pattern of the floor. After that you can start the installation.
11.
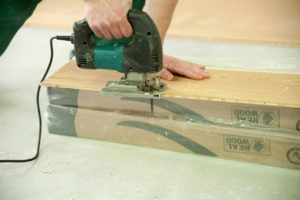
Cut away the tongue from the first strip of the floor, using the saw. This will allow proper execution of the expansion joint, or the wall gap.
12.
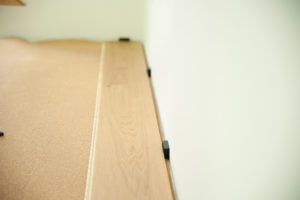
When fitting floorboards using expansion wedges, use an expansion gap of minimum width 7/16’’ (11 mm). An expansion gap should be made along the perimeter of the room and around any other obstructions. Start the installation at the left side of the wall and continue towards the right side.
13.
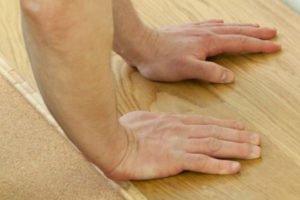
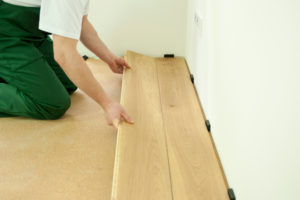
Fit in another board next to the first board. The boards should touch each other along the shorter edge. Begin the second row, starting with the off-cut from the first row. The recommended minimum length for the board starting the next floor row is 11.8” (300 mm). The recommended offset between the board joints along the shorter edge is 19.6” (500 mm). Continue laying the floor across the room. Continue laying the floor across the room. Lay the boards at an angle about 30° along the longer edge.
14.
Begin the second row, starting with the off-cut from the first row. Lay the boards at an angle about 30° along the longer edge.
15.
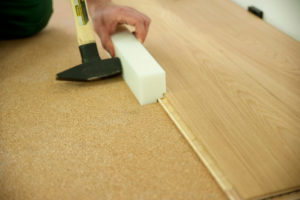
Using the tapping block, connect the Barlinek board on its longer edge. During the installation use a tapping block and a hammer to fit in the boards together along the longer edge. Adjust the tapping block along the entire longer edge of the board and tap it with hammer.
16.
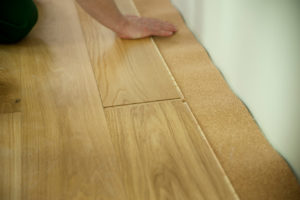
Continue laying the floor across the room.
17.
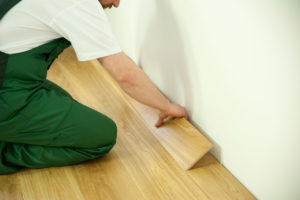
To install the last strip of the floor, measure the necessary board width decreased by the expansion joint of 7/16’’ (11 mm) from the wall. When fitting floorboards using expansion wedges, use an expansion gap of minimum width 7/16’’ (11 mm)!
18.
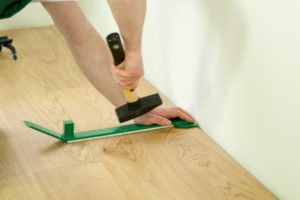
Fit the last board against the wall by tapping it with parquet shunting tool. Remember to leave an expansion gap of at least 7/16’’ (11 mm)
19.
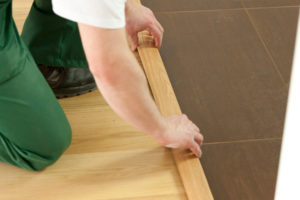
Cover the expansion joint between ceramic tiles and the wooden floor, and in the door frame with a special wooden strip. Installing the floor in the door frame, it is obligatory to leave the expansion joint.
20.
After the skirting boards have been installed, the floor is ready for use. The maximum dimensions of the room without additional expansion gaps in the floor surface are 66 ft (20 m) x 26 ft (8 m), (66 ft (20 m) along the longer edge of the board). REMOVE ALL EXPANSION WEDGES BEFORE STARTING THE INSTALLATION OF SKIRTING BOARDS. If the floor is to be covered/secured, use breathable material such as regular or corrugated cardboard. Do not cover the floor with plastic materials, e.g. foil. For the product warranty and the floor care and maintenance guide, see www.us.barlinek.com

A FLOOR LAID IS A FLOOR ACCEPTED!
Final inspection responsibility rests with the consumer or installer. Please ensure the product is accepted for colour correctness, finish effect, and overall appearance. No labour charges or collateral expenses will be covered if the product is not suitable to the consumer, and it has been installed.
